
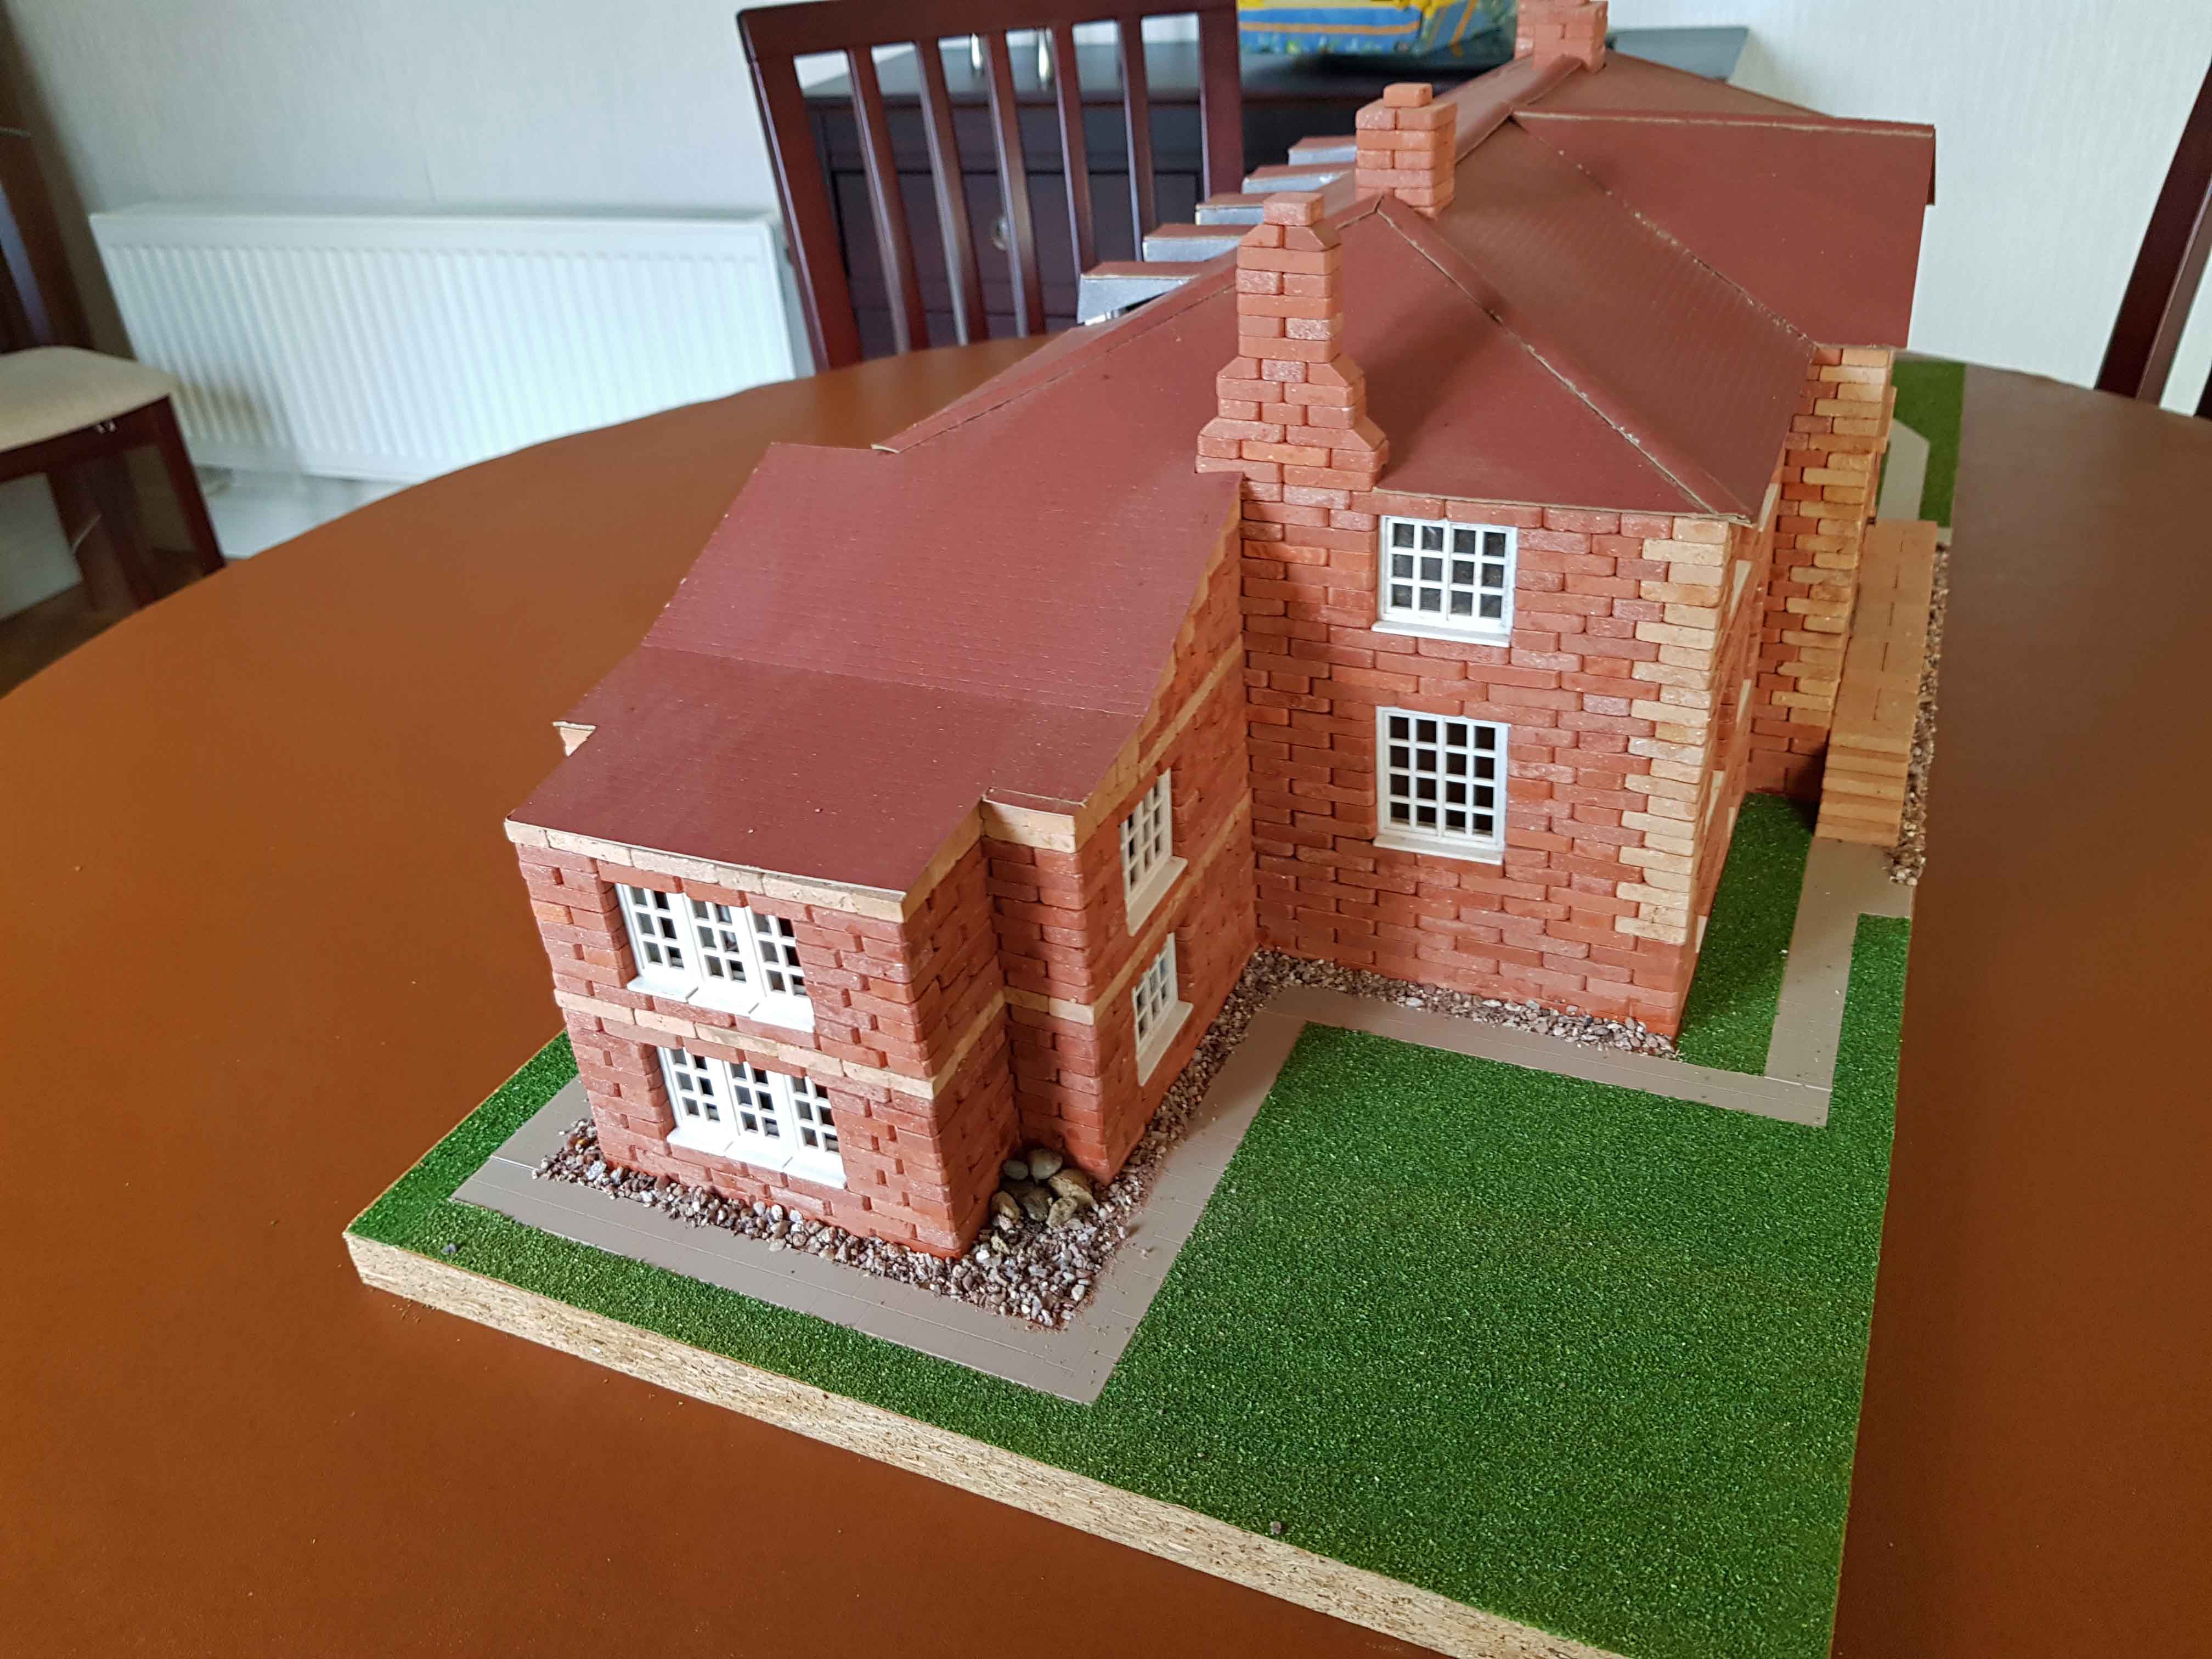
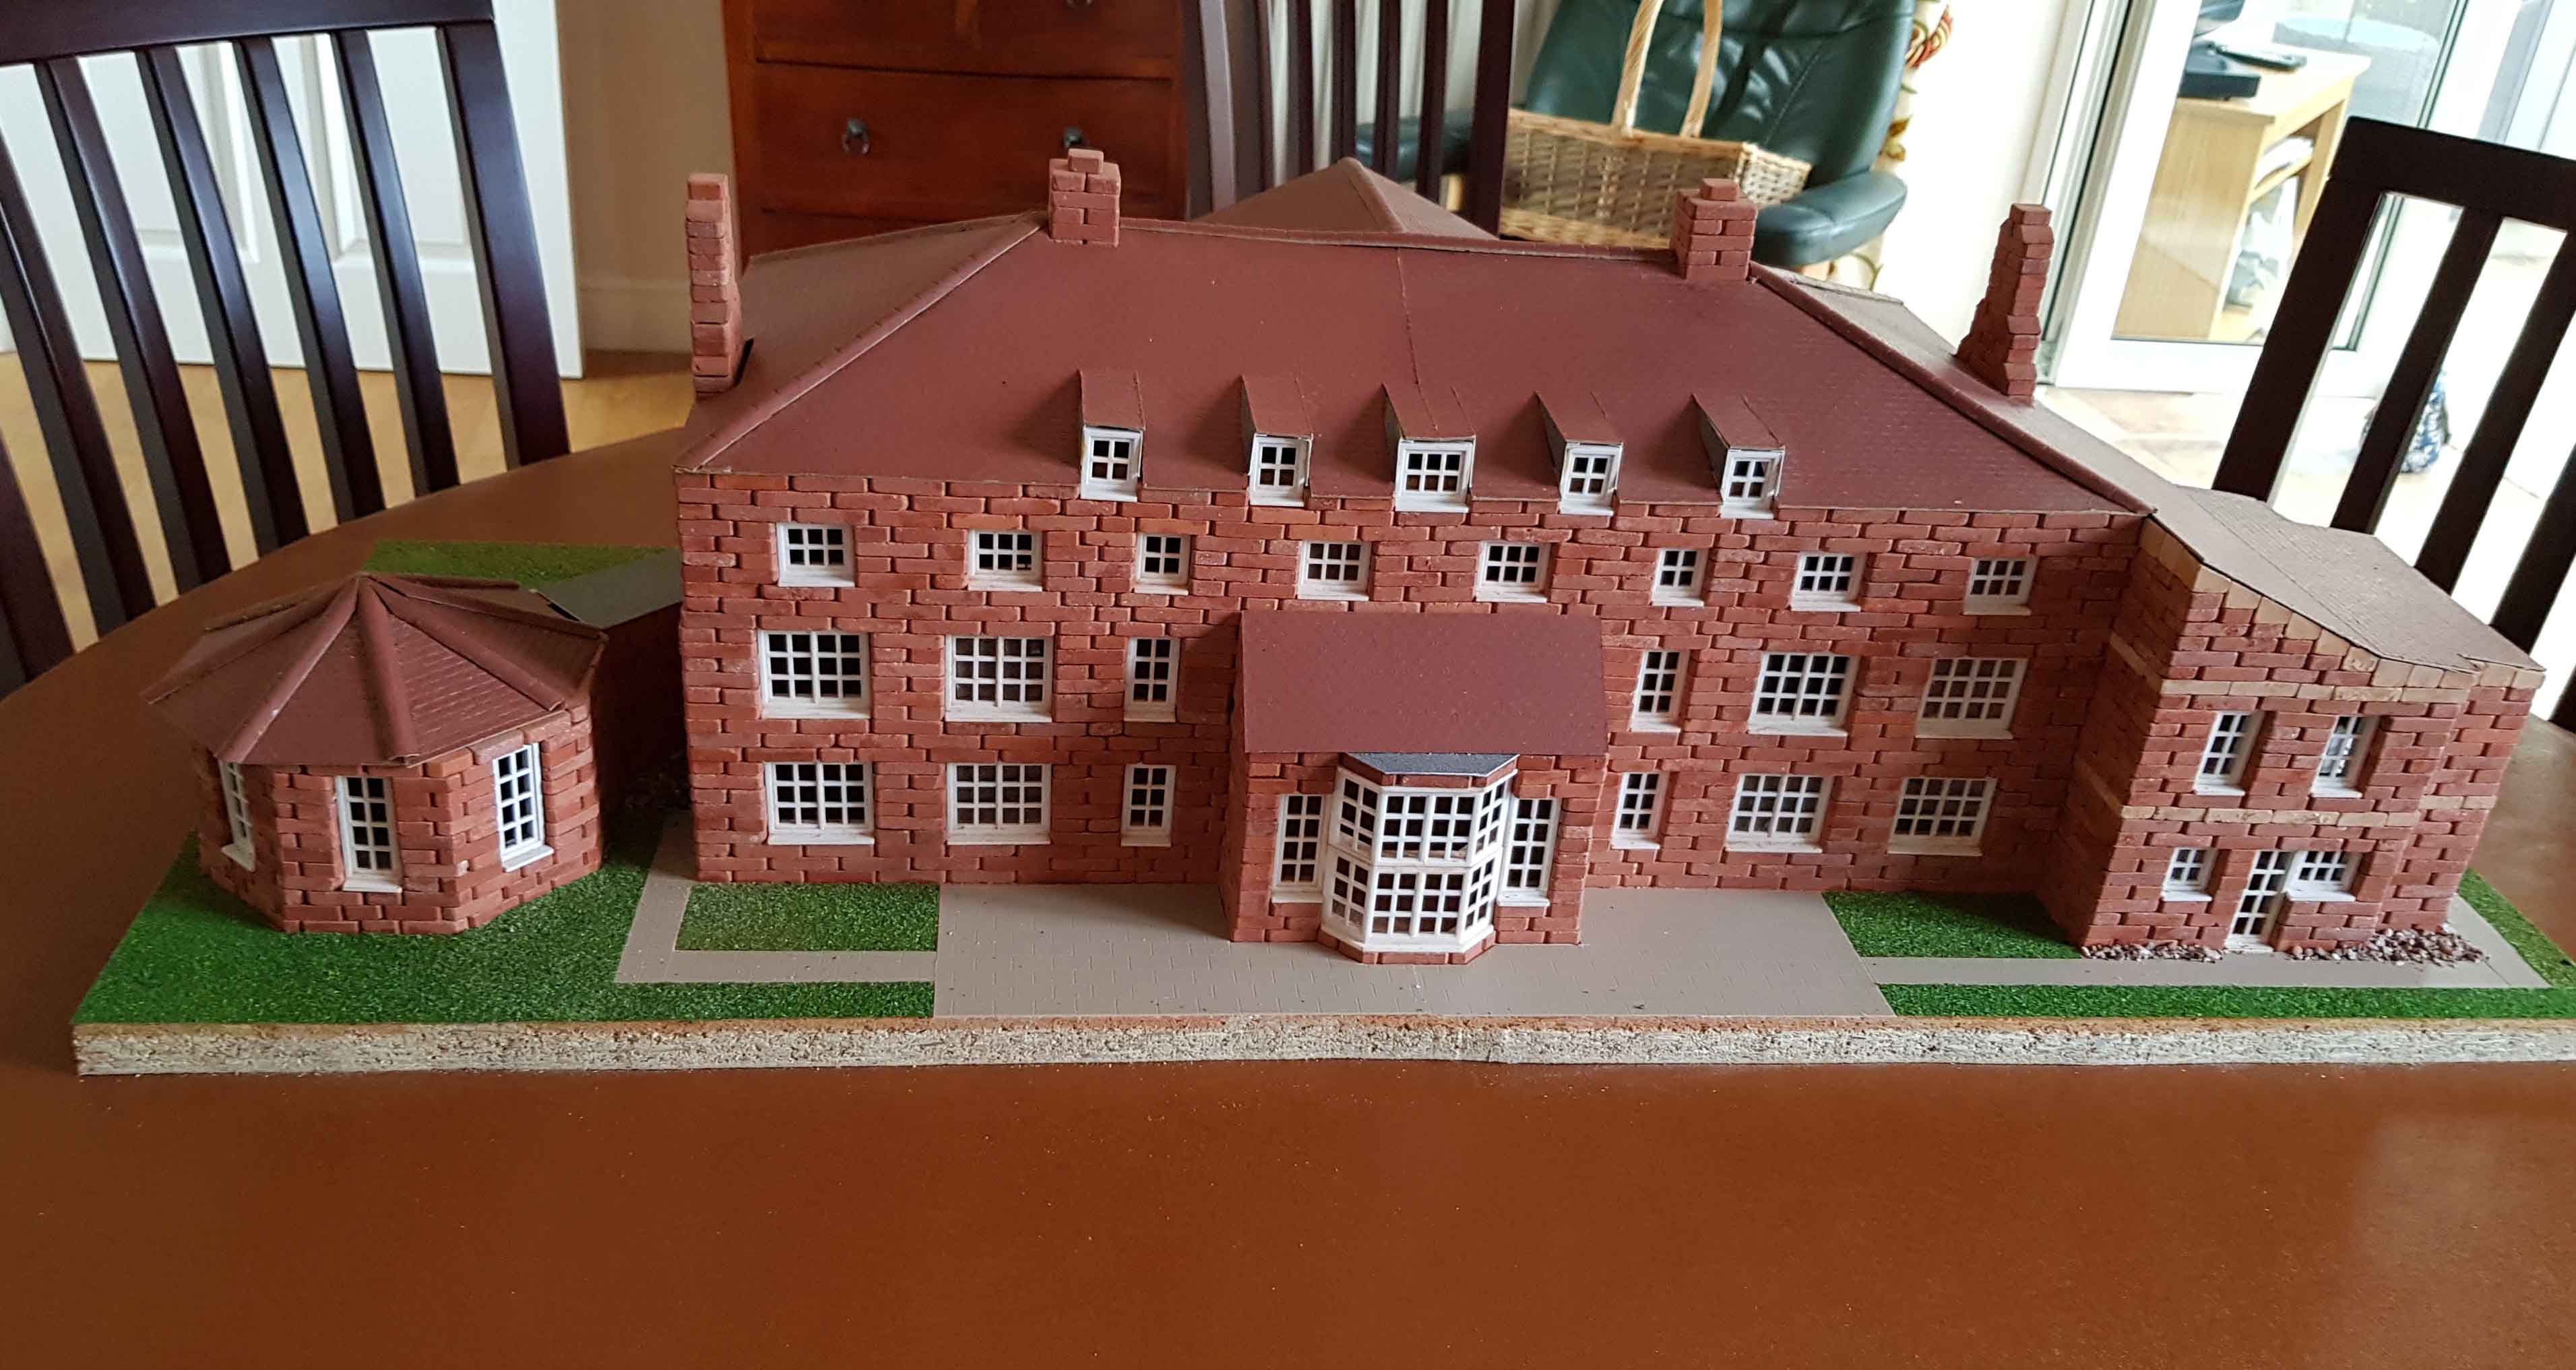



I did not of course have a blueprint to work from, so I drew out my own ground plan. The images below show the plan as it was actually built. It is drawn to scale, but the width meant I had to use two pieces of paper! Click on the images to see them enlarged.
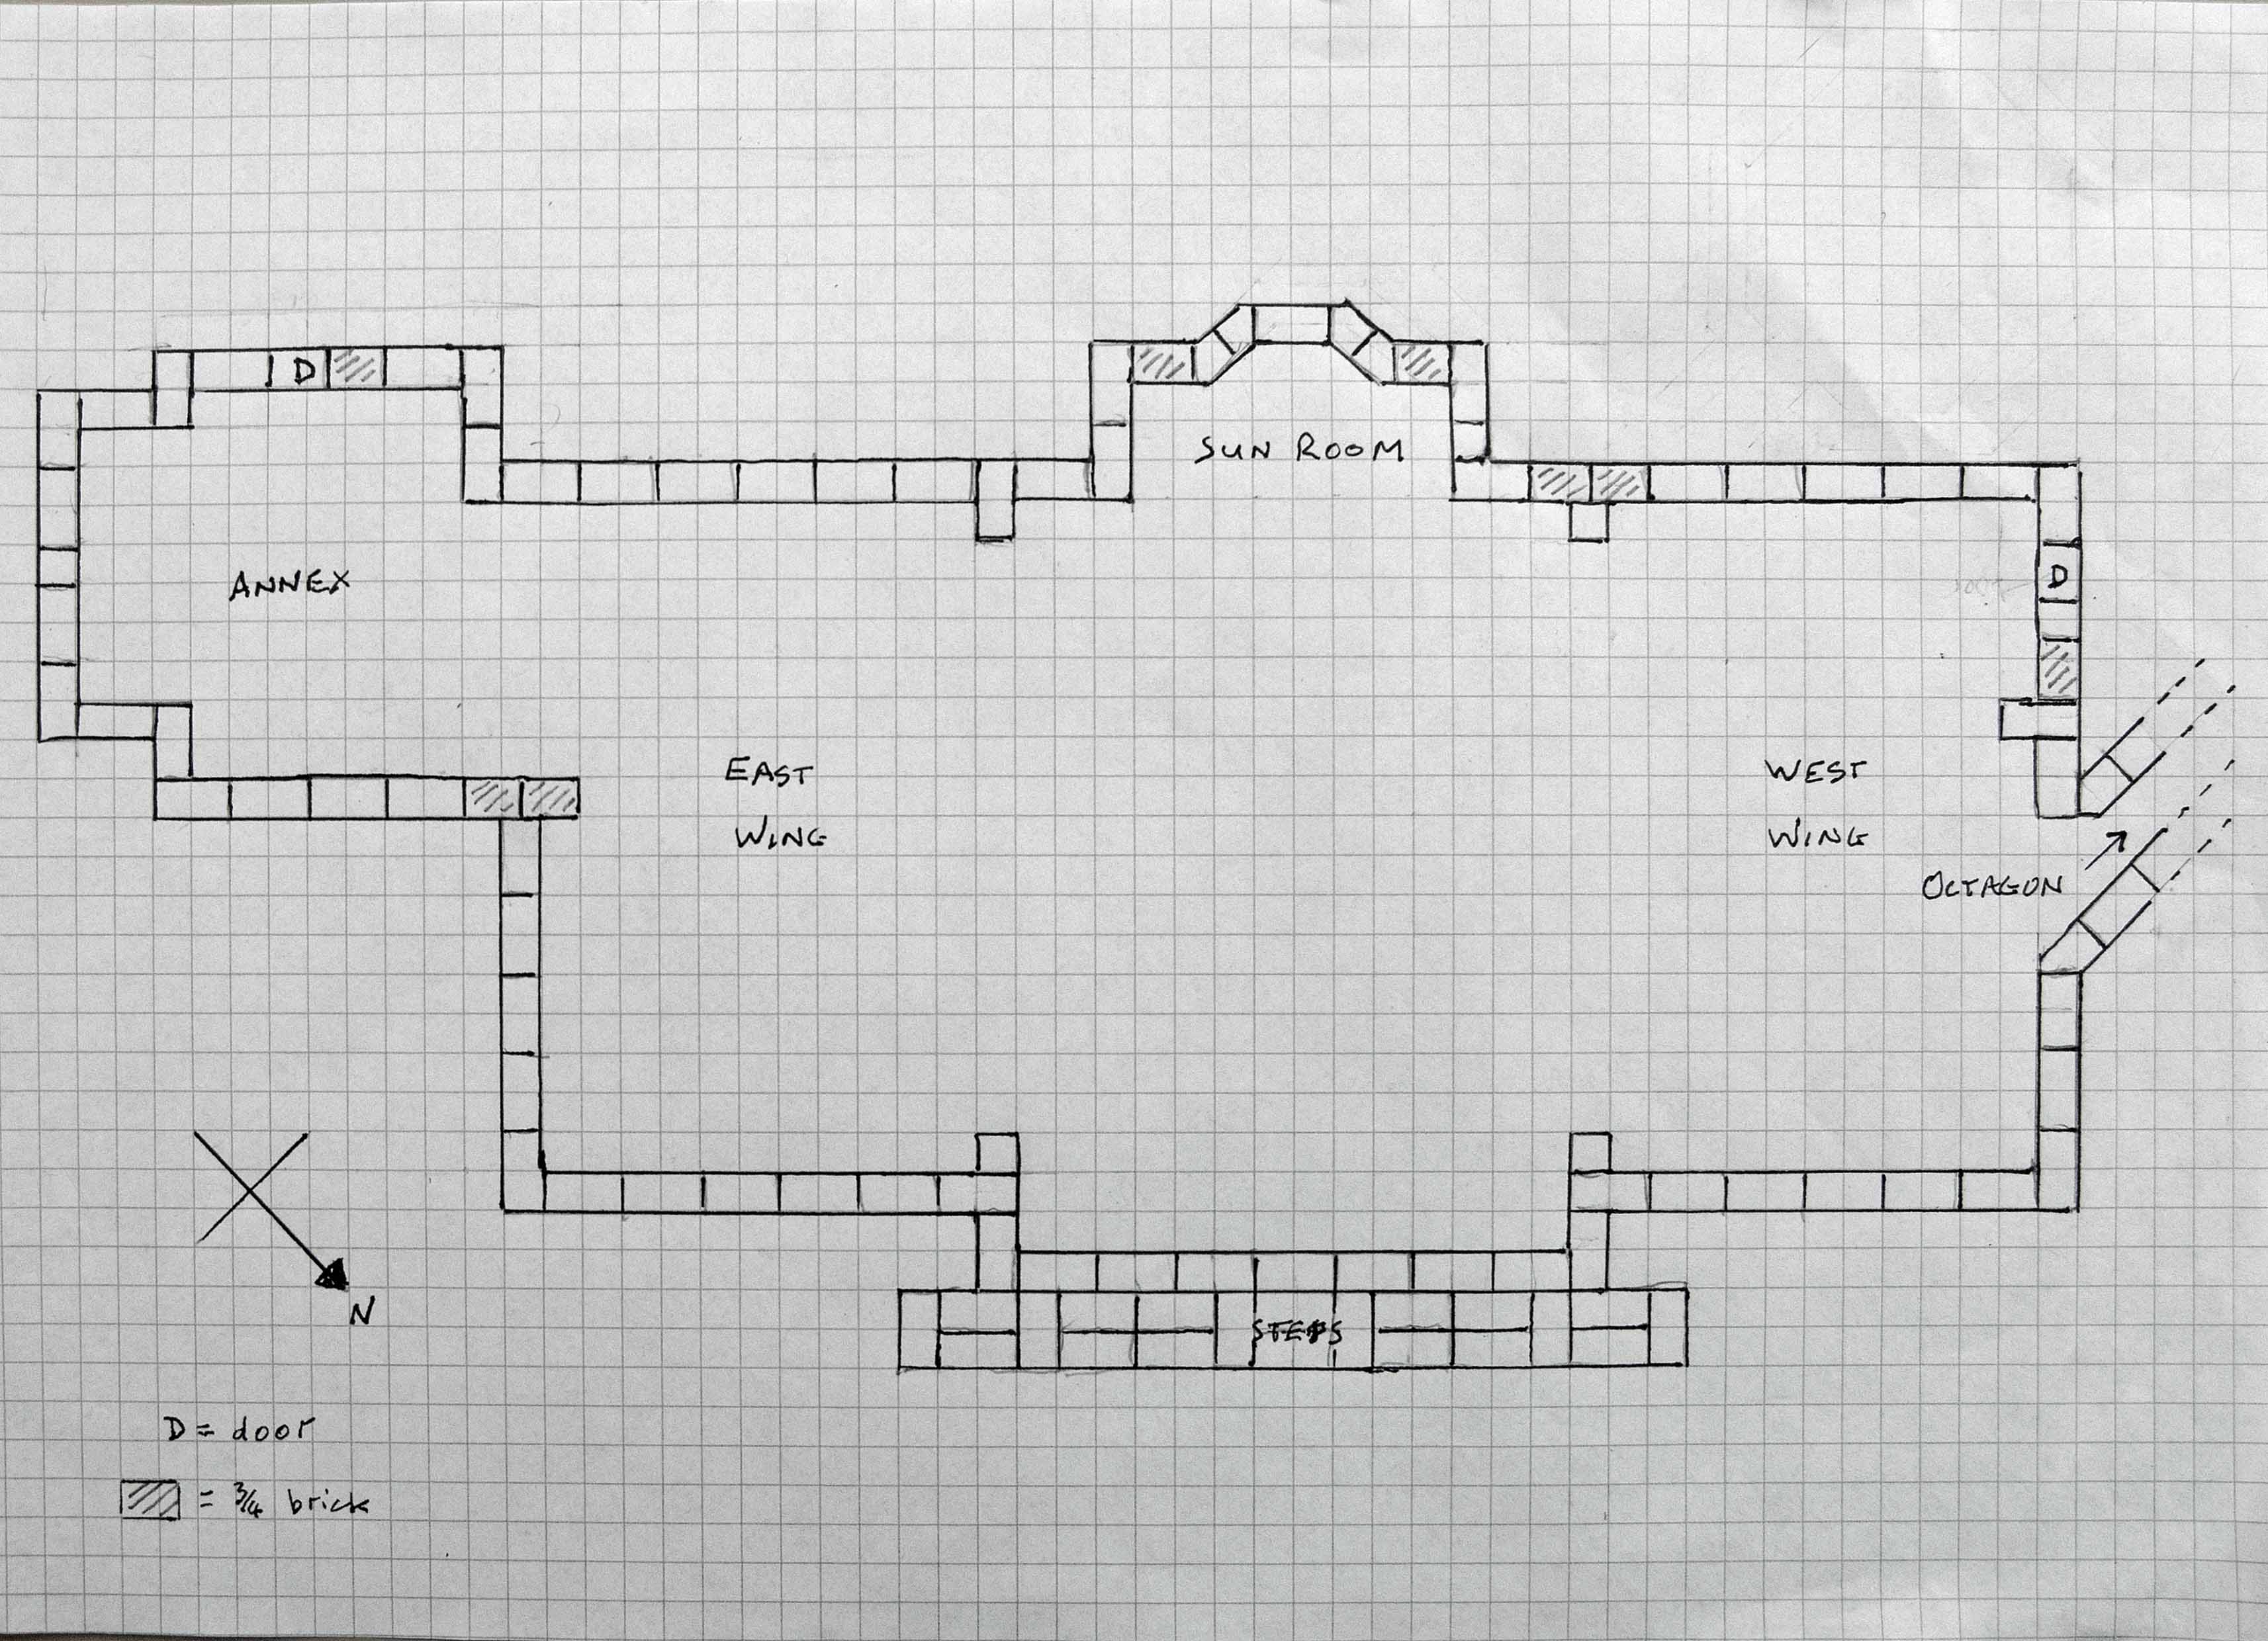
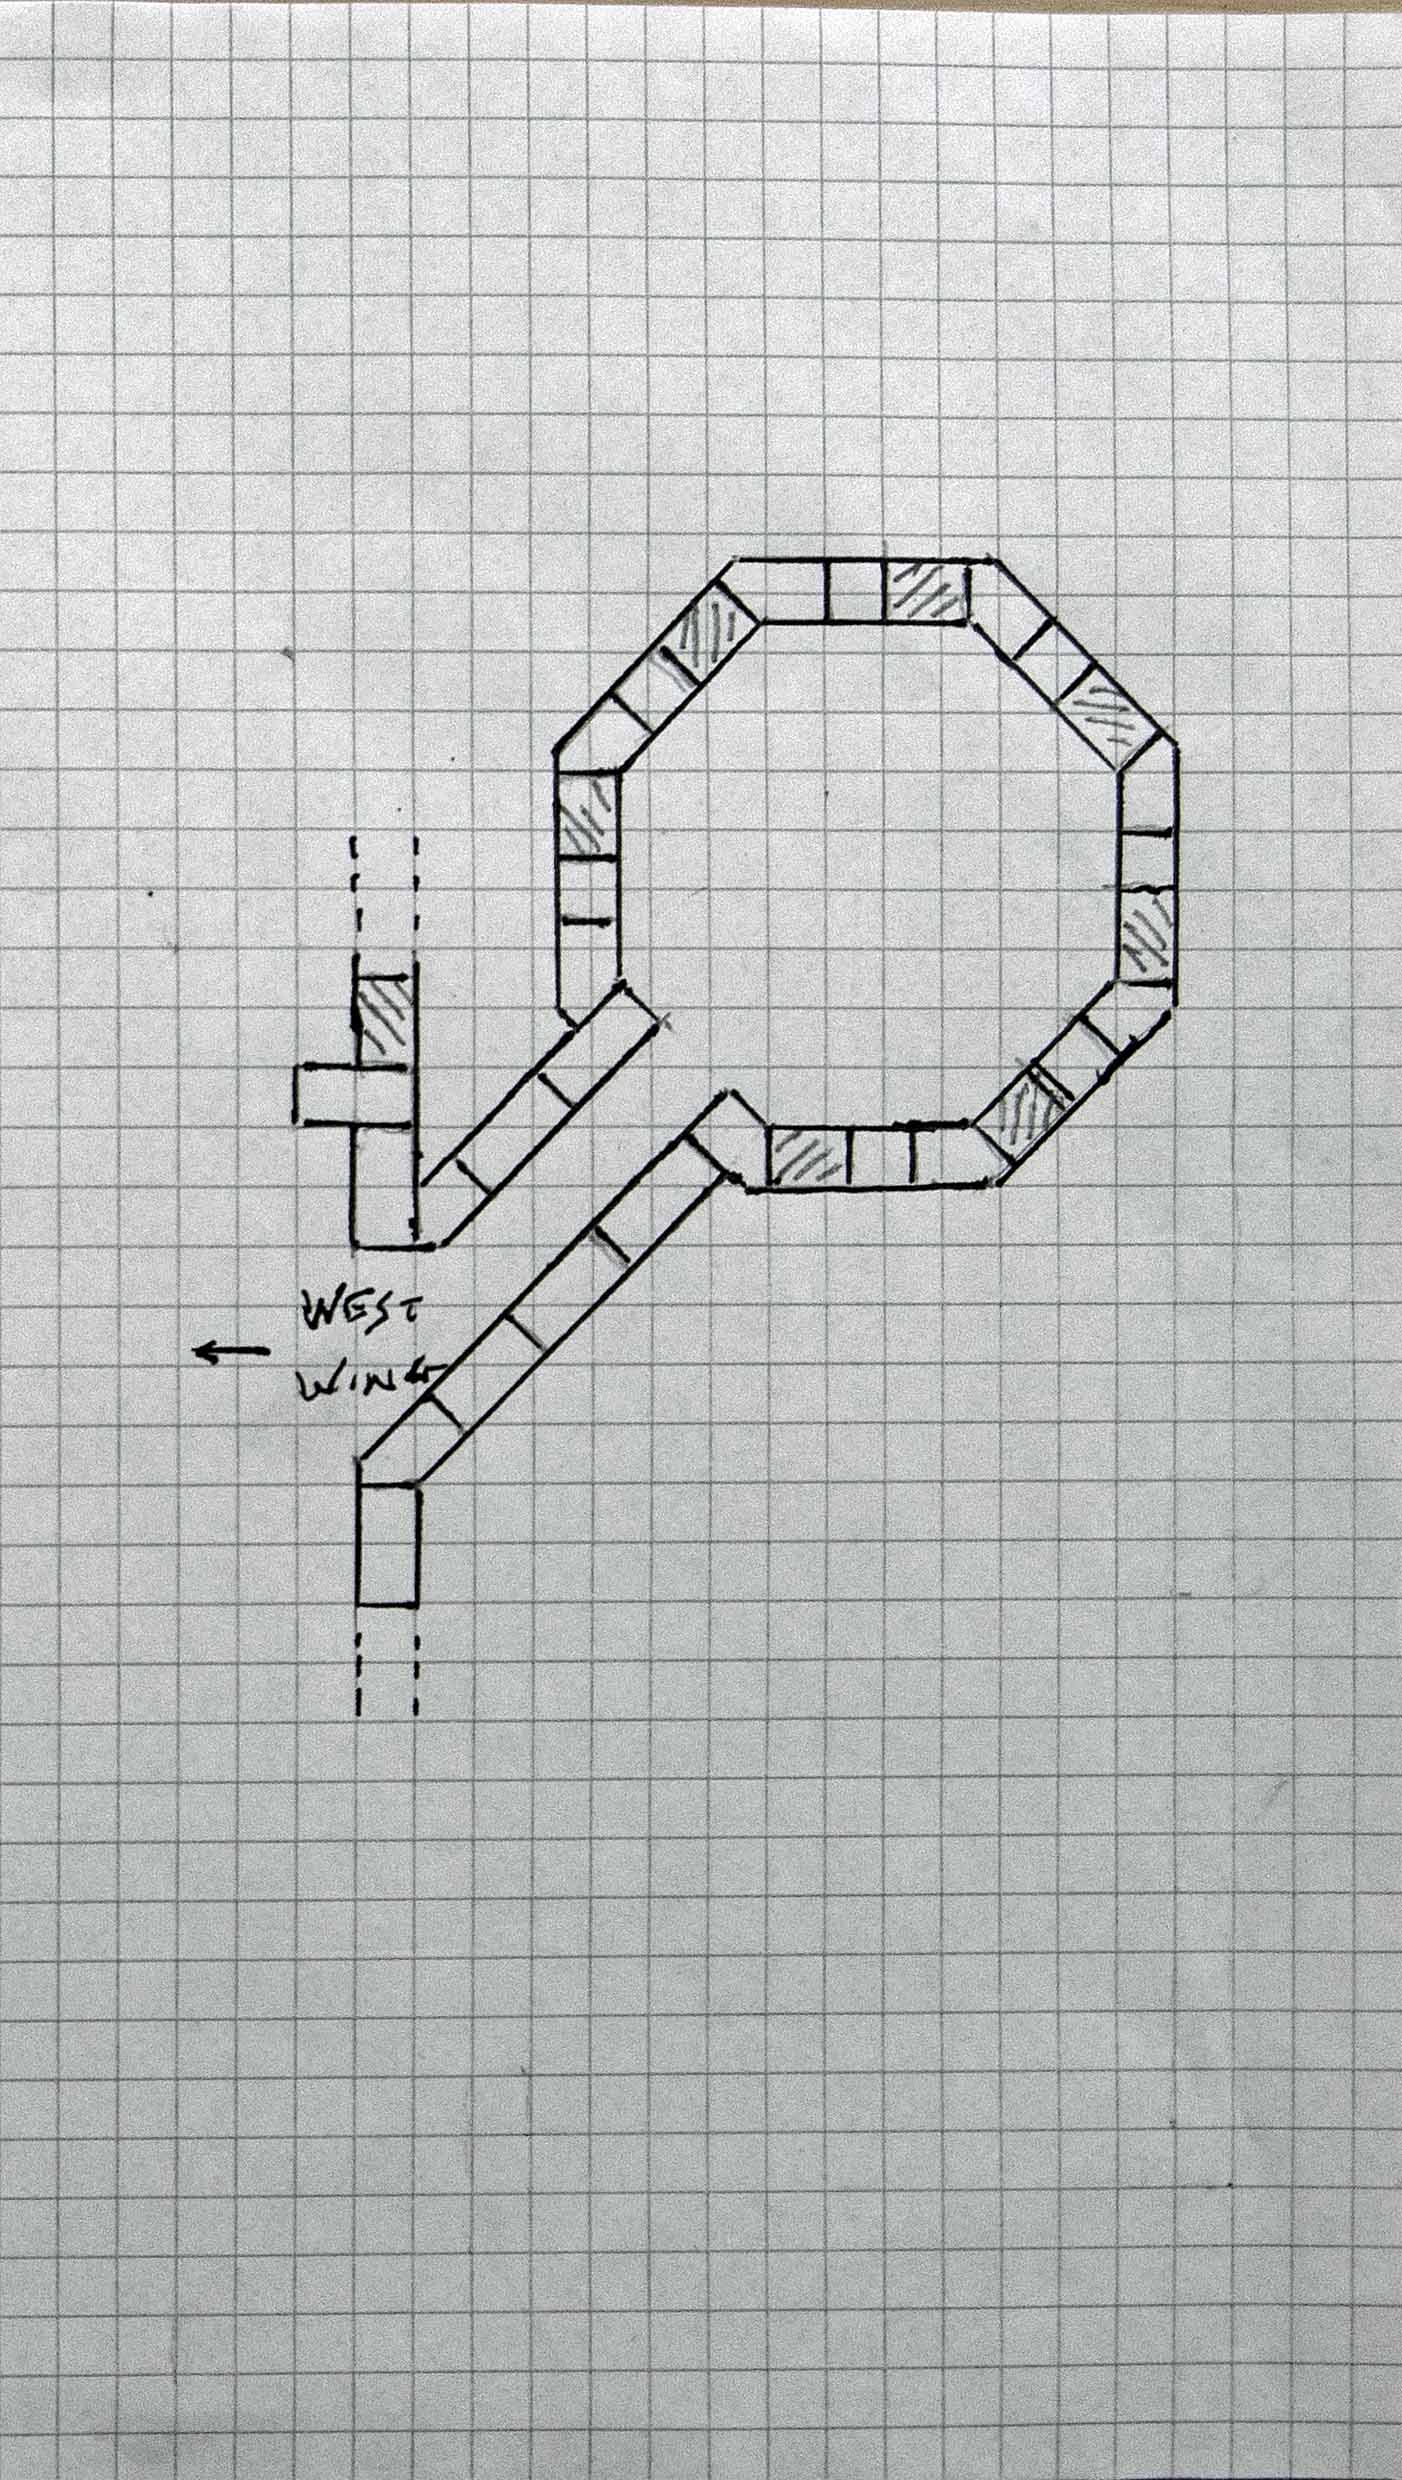
The original ground plan was crudely drawn and not to scale, and the plans above have been drawn up for this webpage. I had originally not allowed for a step at the front to reach the grand entrance door, A suitably grand stairway would be required, but rather than redesign the whole house I compromised with a long and narrow construction. At the scale equivalent of four feet wide, it would not accommodate two visitors climbing side by side! My first lesson from this project was that in future projects the base board should be big enough to allow for some design changes.
I also made rough sketches for the house, showing front, back and side elevations. They show the house more or less as it was eventually built. Click on each image to see it larger.
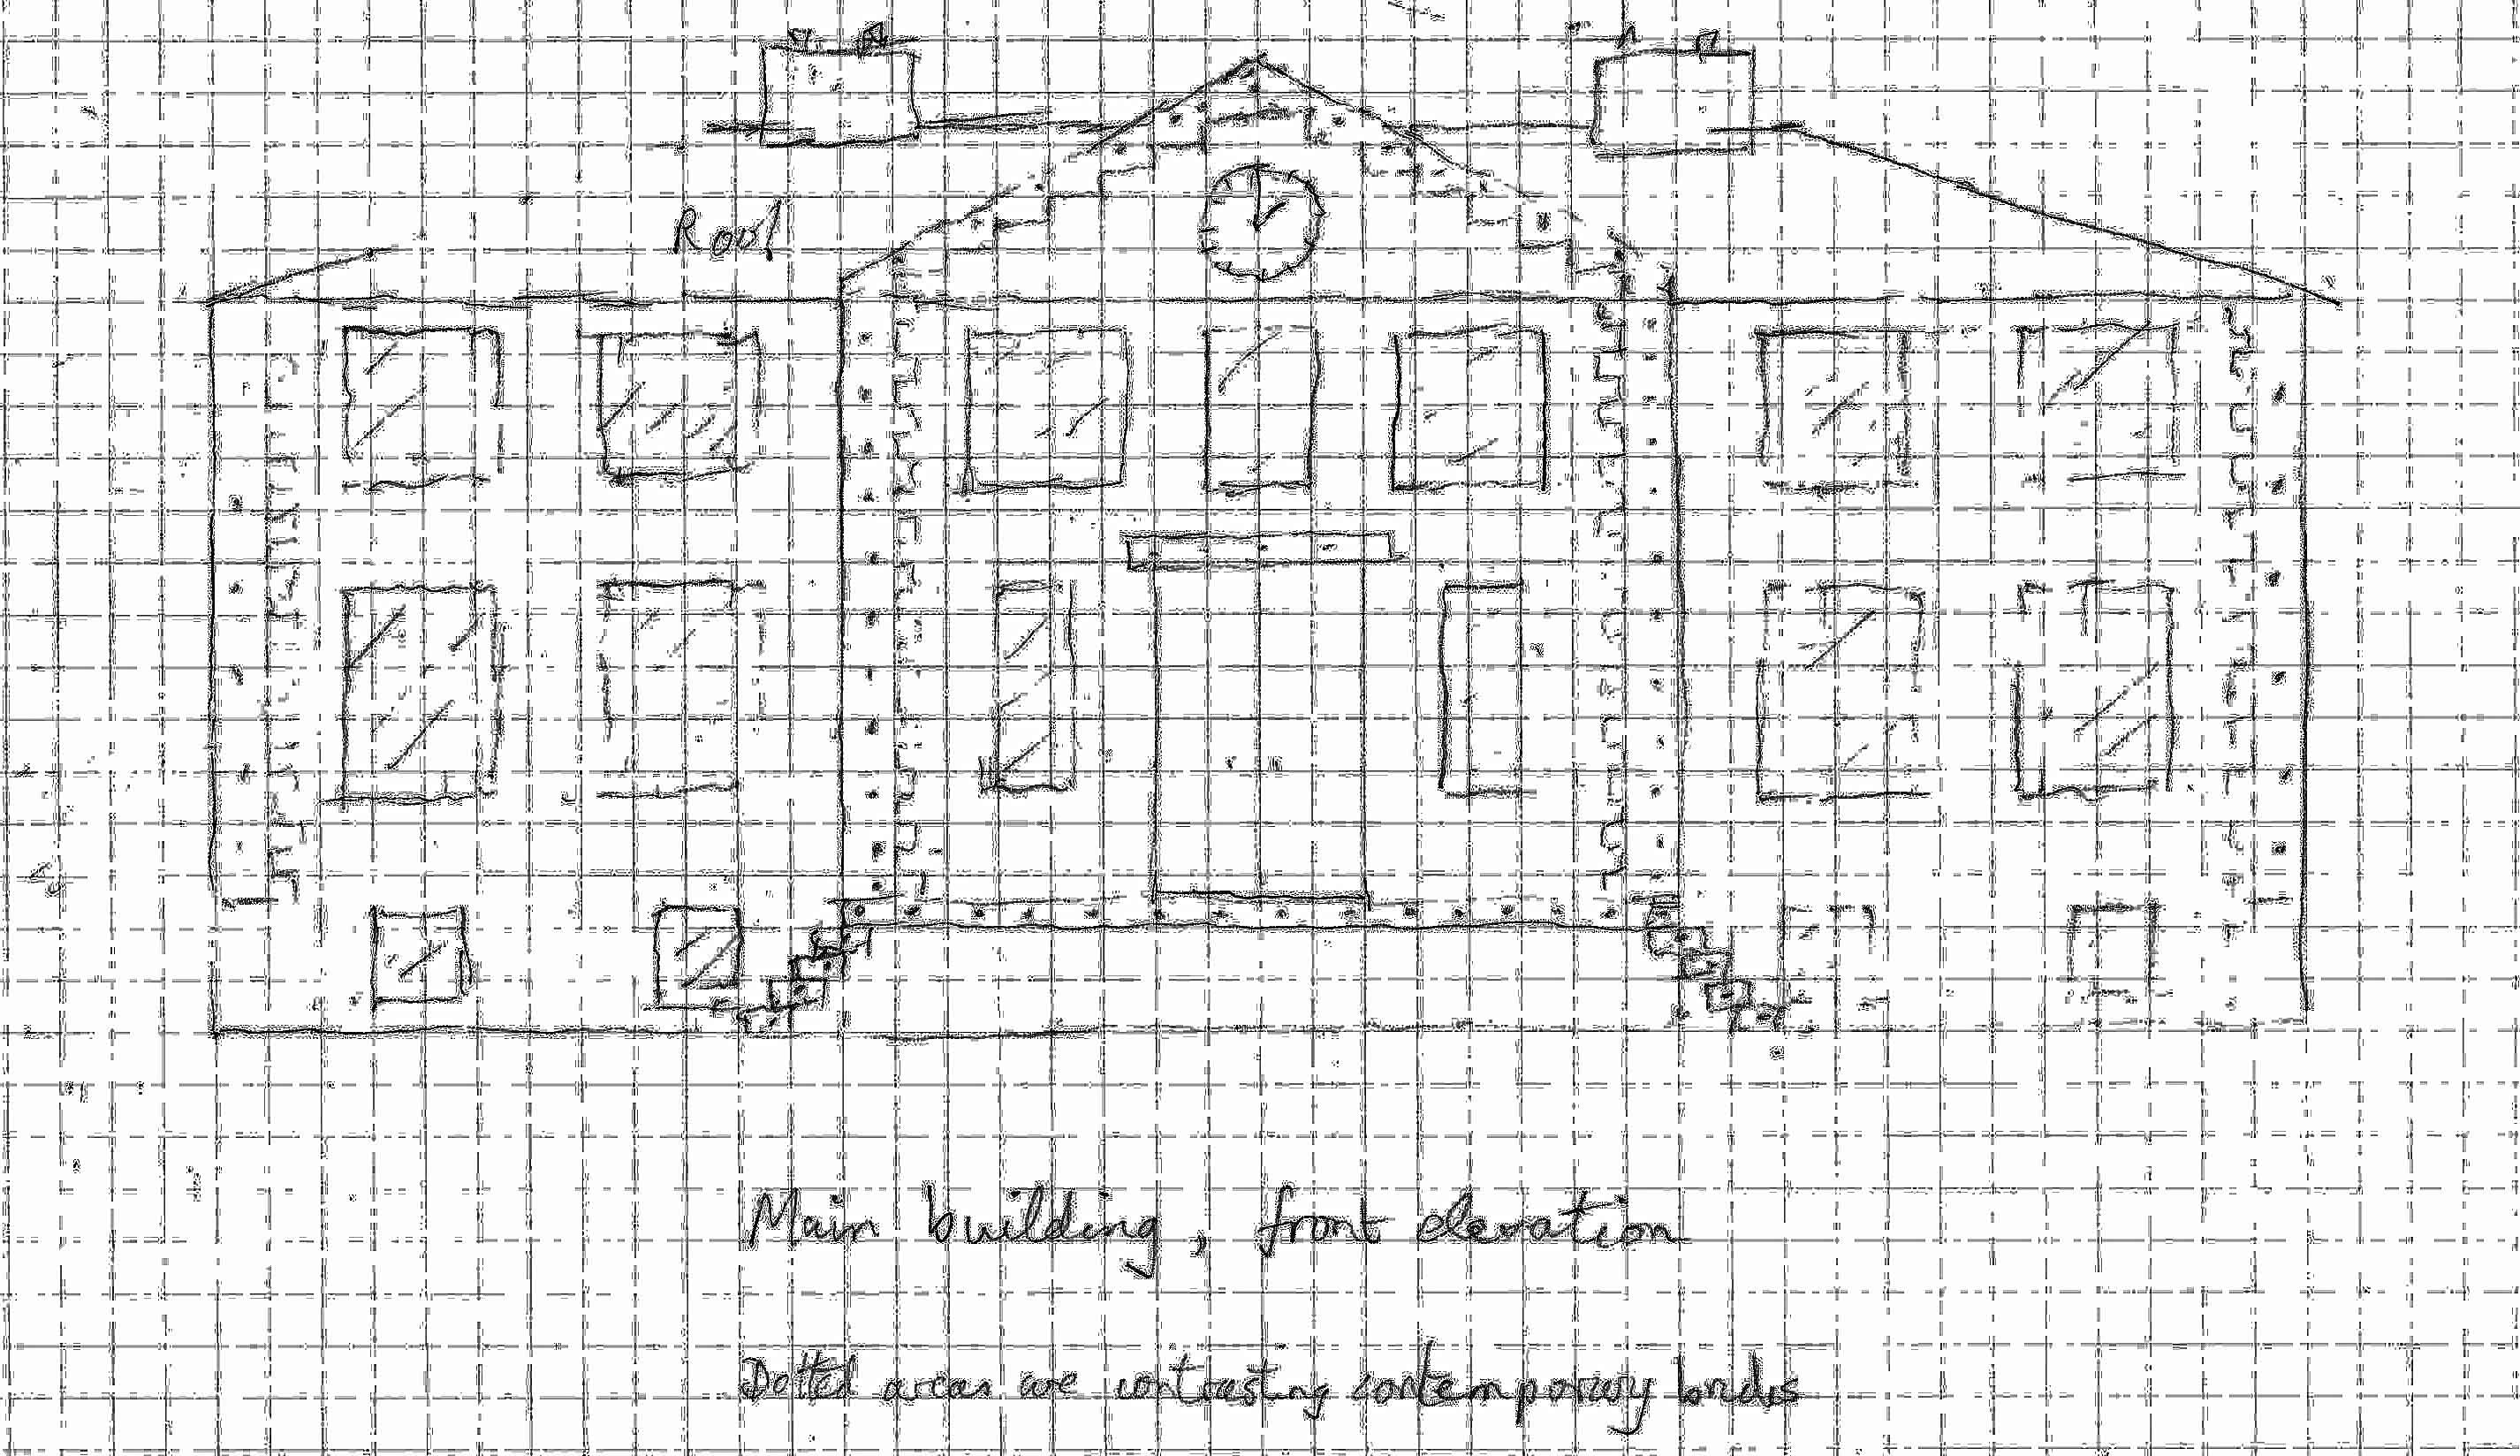
The front stairway leads to an imposing front door (made using the large garage door F16). The main floor of the house is at this level, and would have been thought of as the ground floor. It features large windows at the front that are envisaged as making grand reception rooms, perhaps a ballroom! Below the ground floor level is a basement that would have extended below the physical ground level, where we can see small windows that are envisaged as being for rooms where servants worked, such as the kitchen or scullery. There are windows, still quite large, on the first floor level.
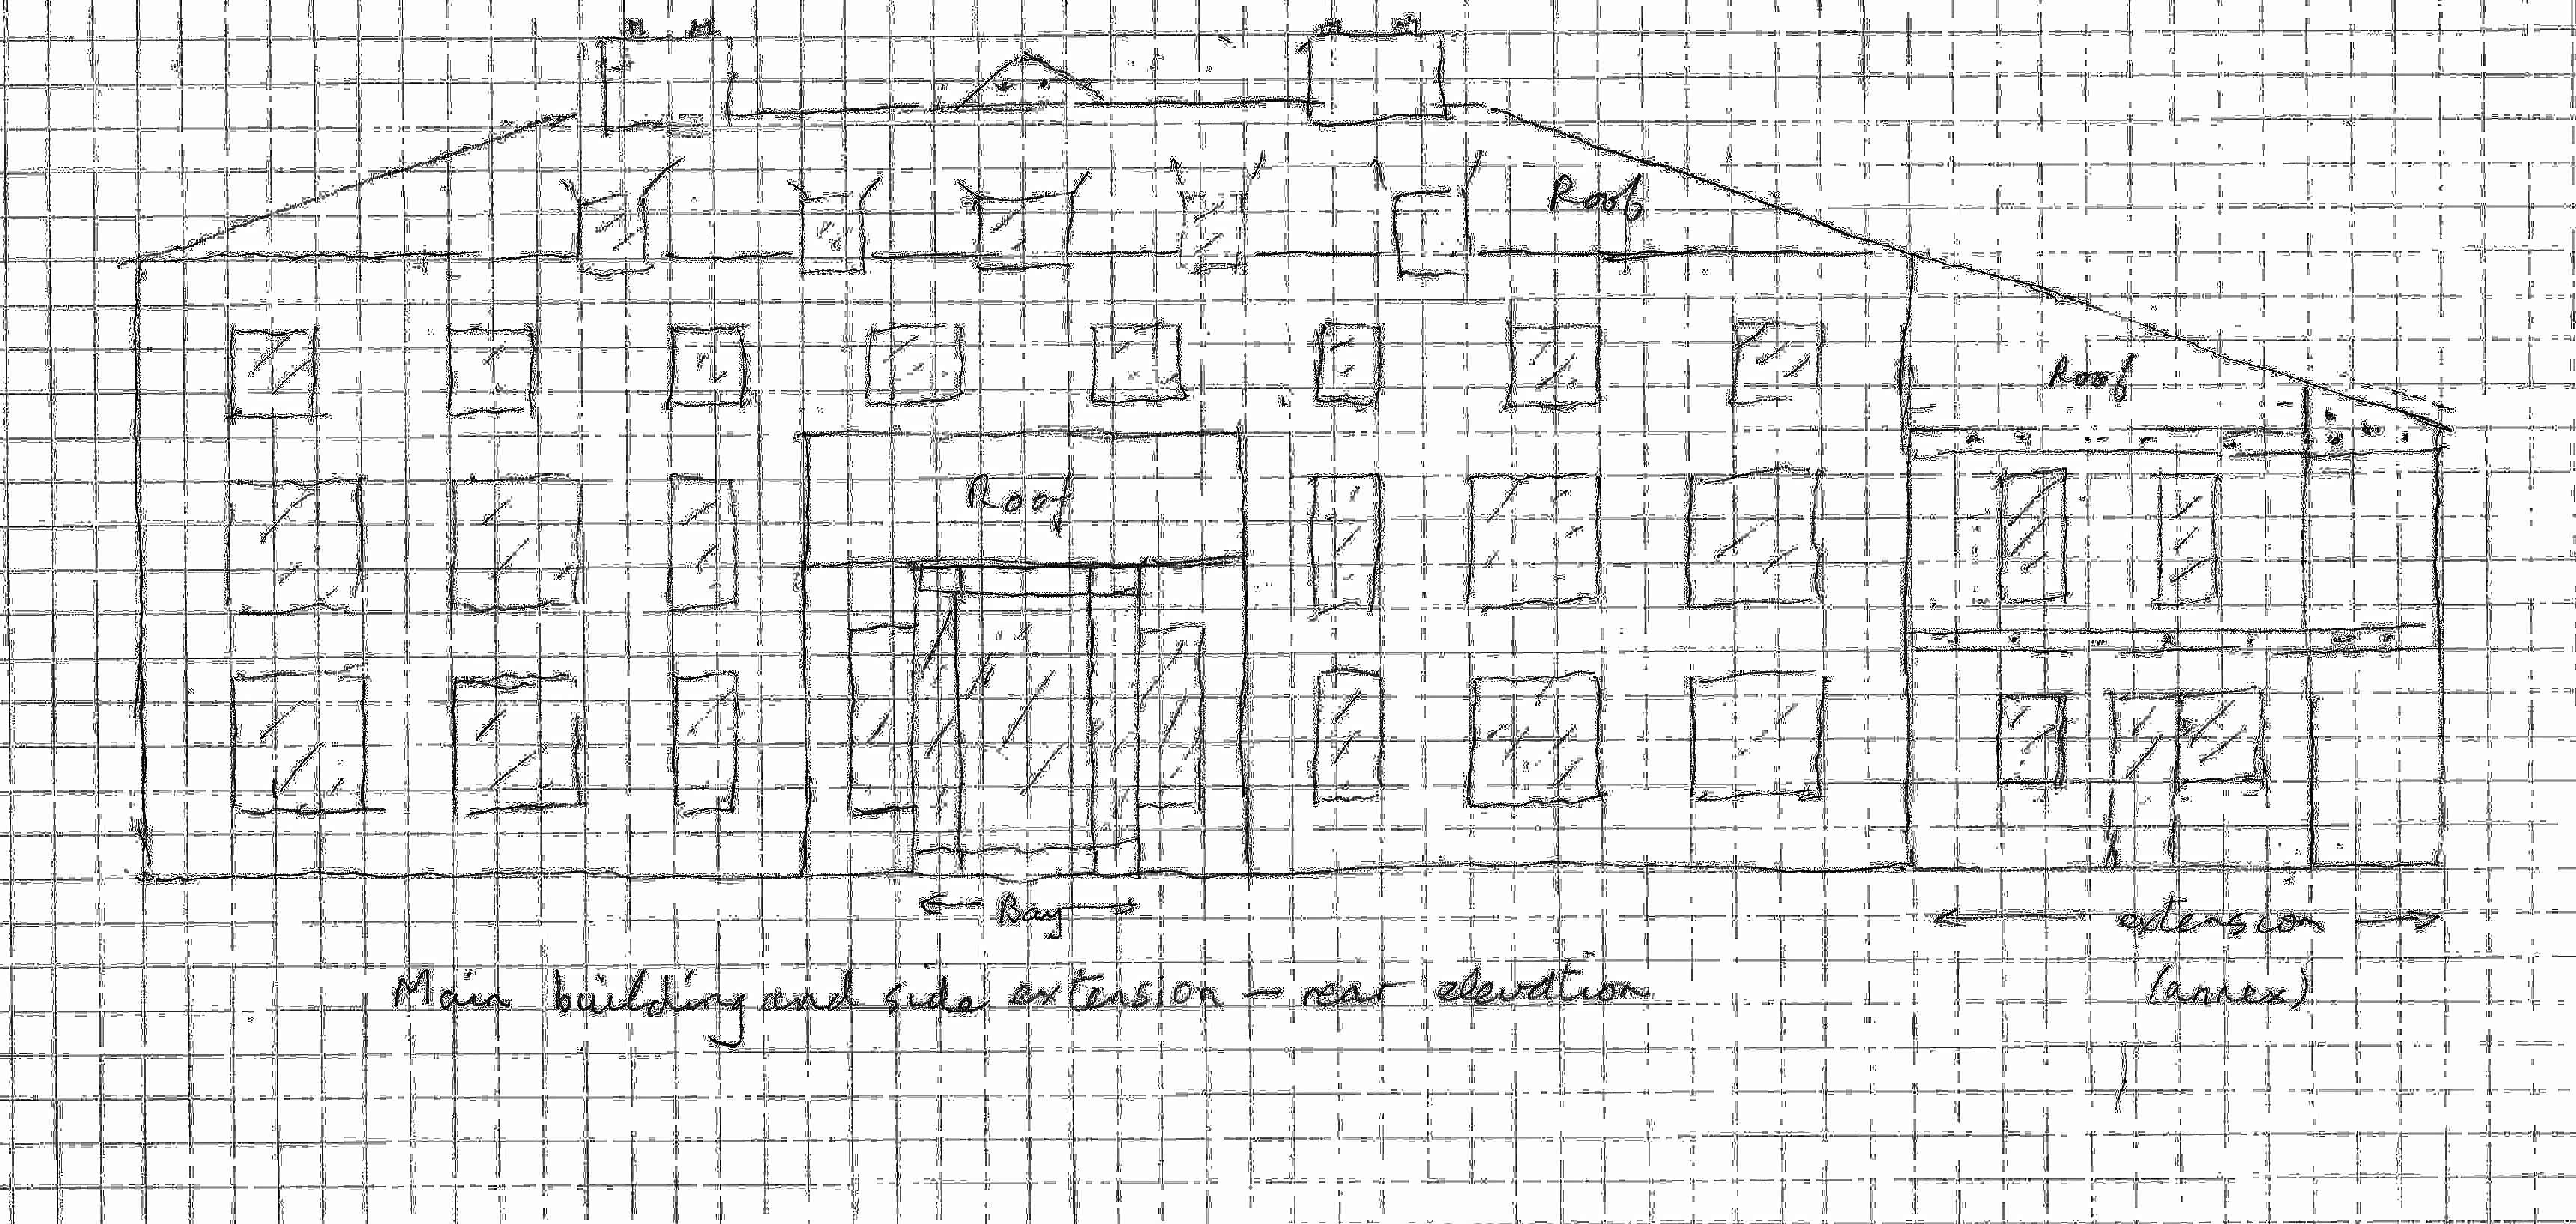
At the back of the house, however, the everyday living areas of the household form a ground level that is not raised above the physical ground level, including the Sun Room, which has floor to ceiling bay windows. (A small door tucked away at the West end of this floor, and not visible in this elevation, is a servants' entrance that would lead down to the basement.) Above this level is a first floor, envisaged as bedrooms plus accommodation for visitors. There is then a second floor, and above that are rooms set into the roof with dormer windows, intended to represent servants' accommodation.
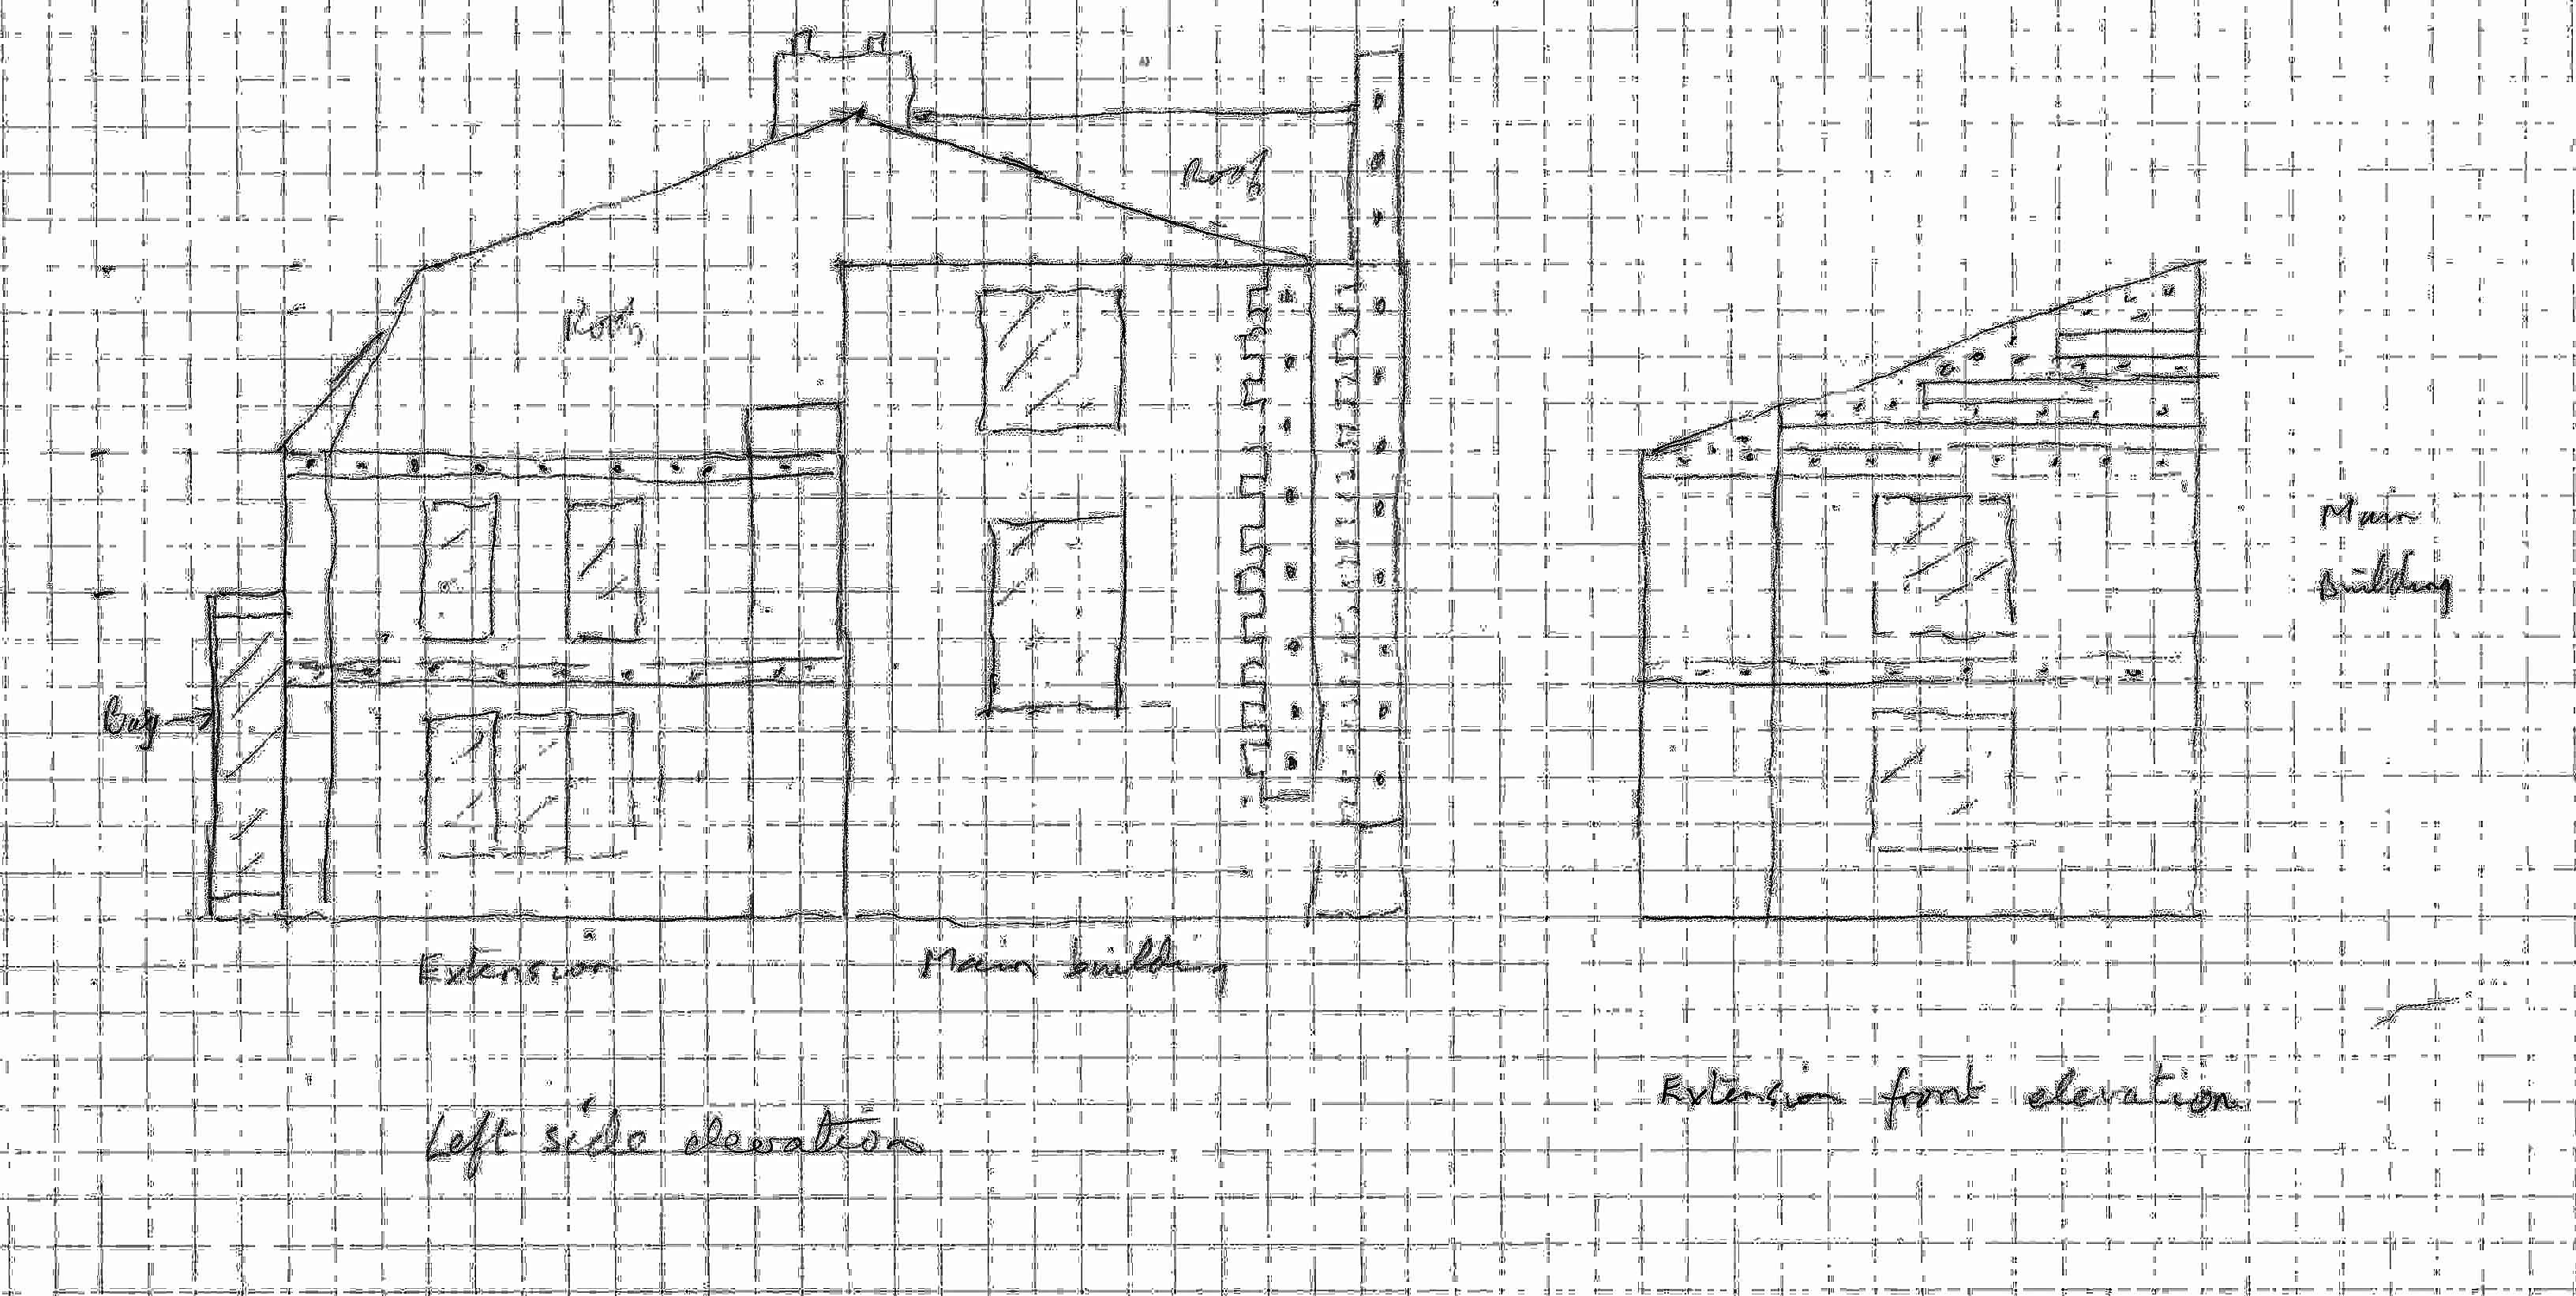
The Annex, attached to the East of the main building is envisaged as a later addition and has its own entrance door at the rear. This elevation also shows the change from the grand rooms with high ceilings at the front to regular rooms with an extra floor at the back.
The Octagon, not shown in these plans, is another addition housing the Library. I added this for the fun of building the octagonal shape using lots of the splay bricks B8 and B9.
Contemporary bricks are also used for sloping roof edges, but more of this later.
One feature of the finished building that was not planned in these sketches is the extra chimney stacks at each end of the main house. These were a good suggestion from a friend about half-way through the build.
The next photo shows the contruction at an early stage. The steps at the front are completed, as are the basement windows. A good start has also been made on the octagon.
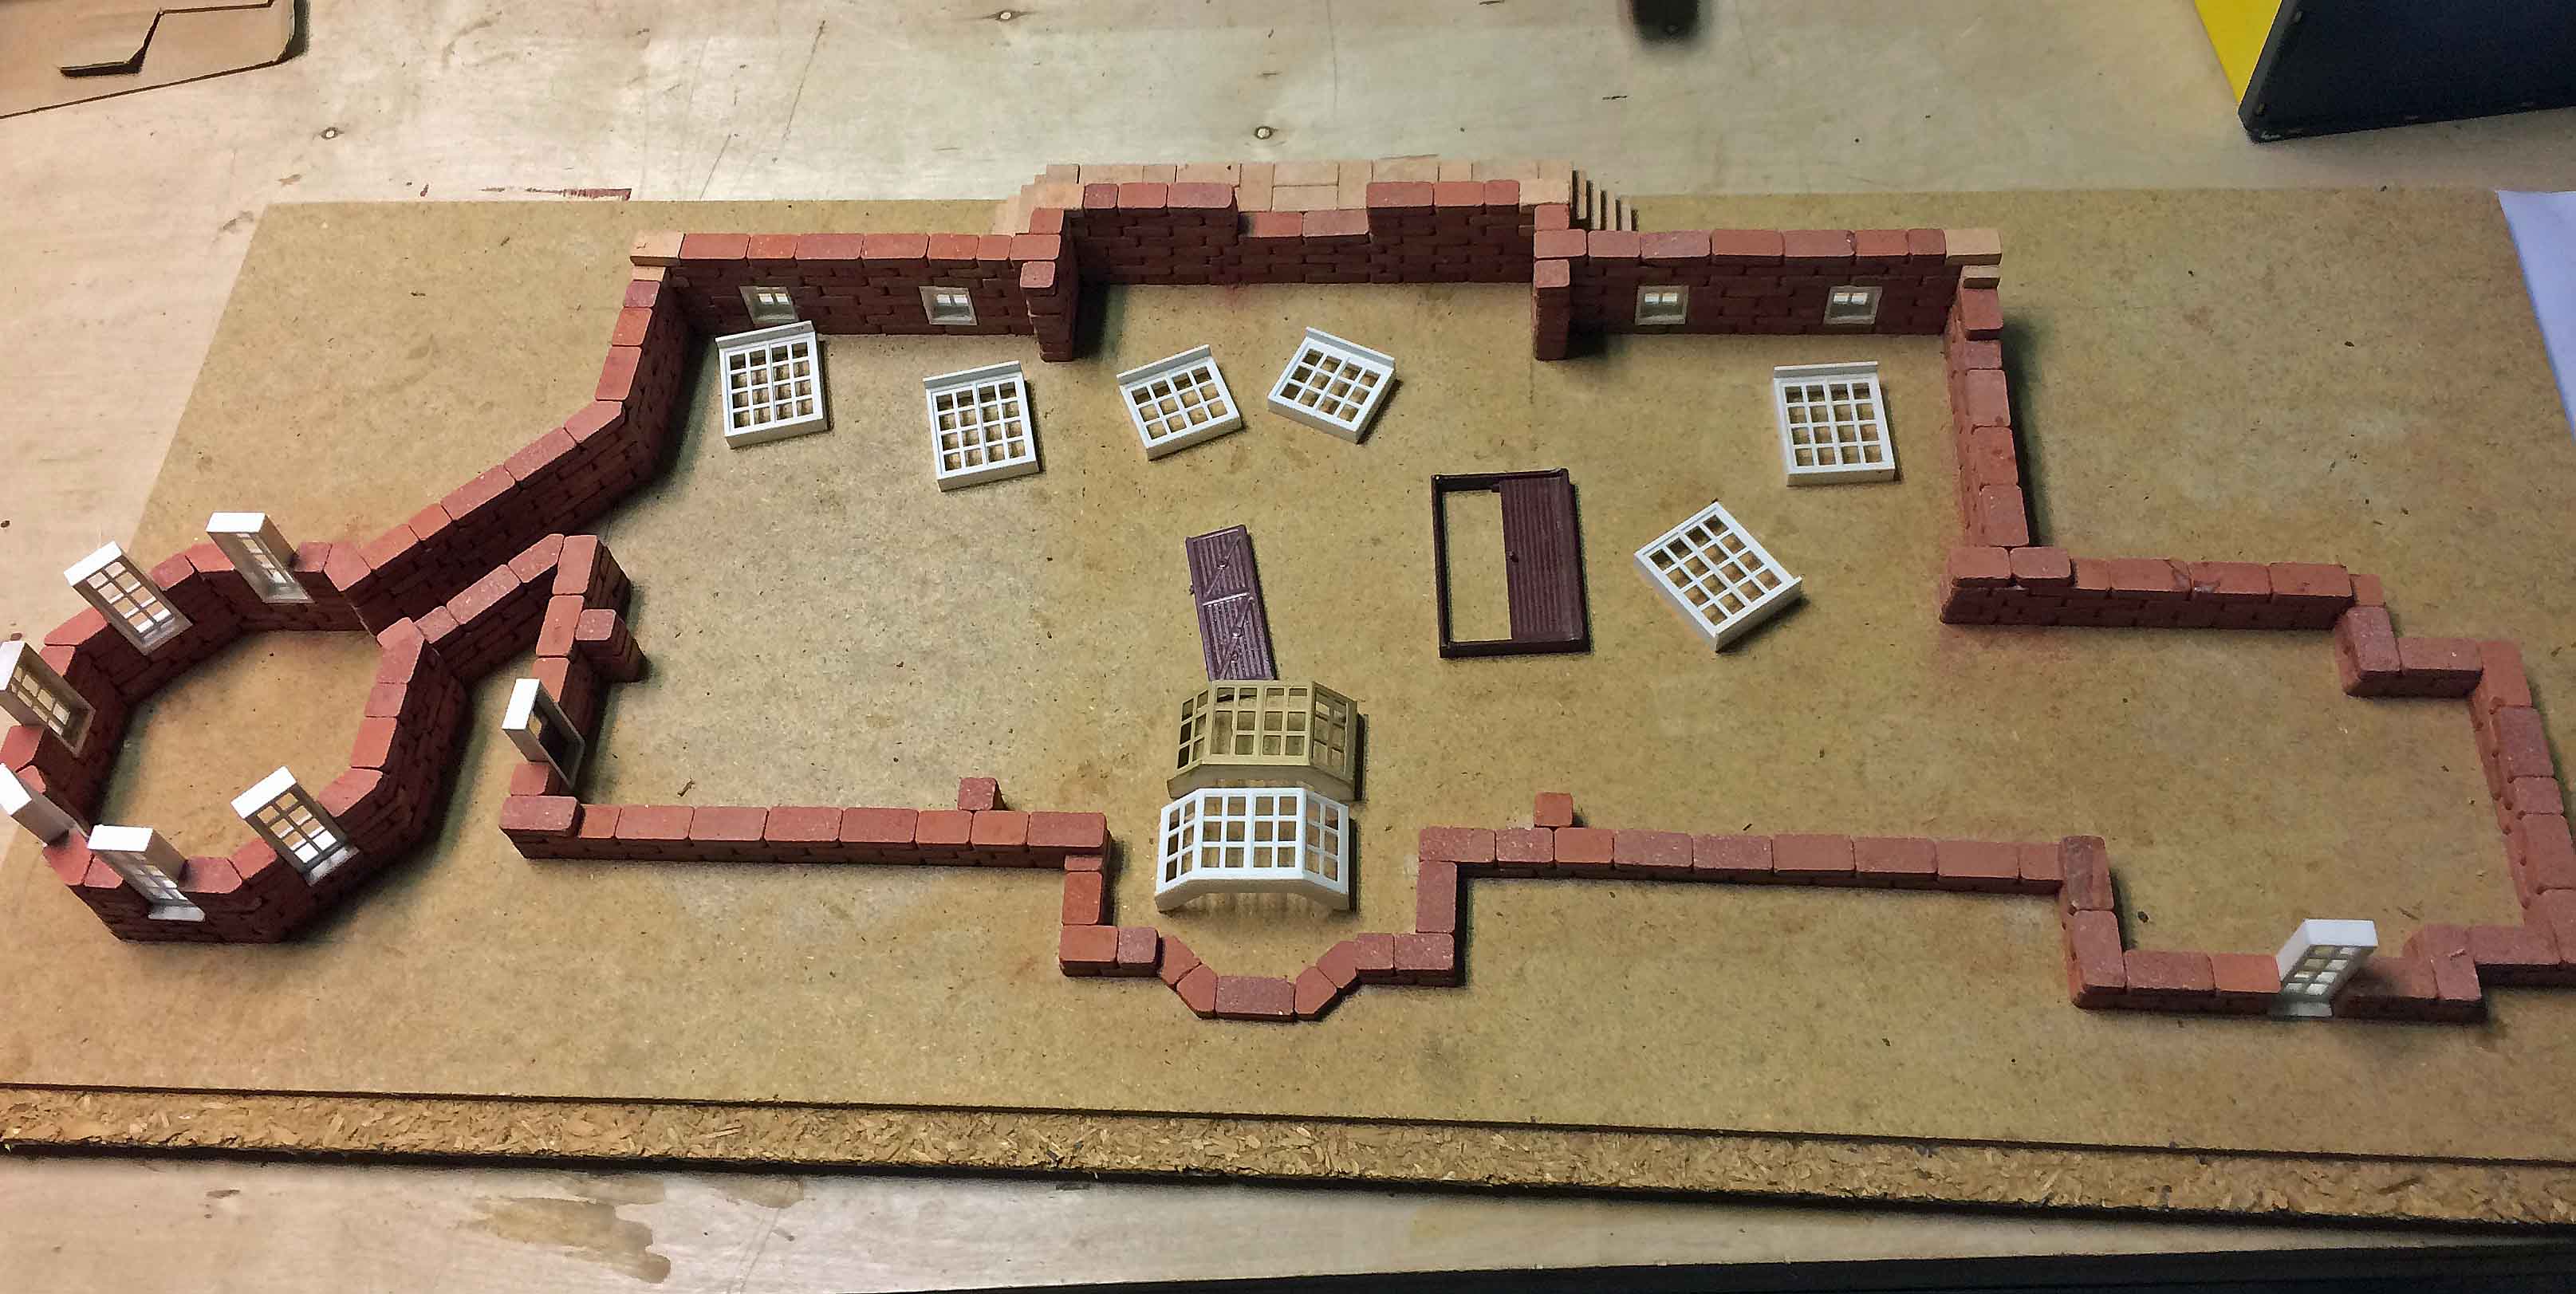
Notice the six places around the interior of the main building where there are half-brick projections in from the walls. When i started, I had never built anything this high, and I didn't know whether the walls might distort or collapse, so these studs were introduced as reinforcing. In the end, they were not needed for that purpose; the walls will stand up very well without them. However, they did have another purpose to be explained later.
The use of splay bricks in building the bay window for the Sun Room and all round the Octagon can also be seen in the image above.
The photo below shows a more advanced stage in the construction. The Octagon is complete and all the windows are in place except the dormer windows at the back. p>
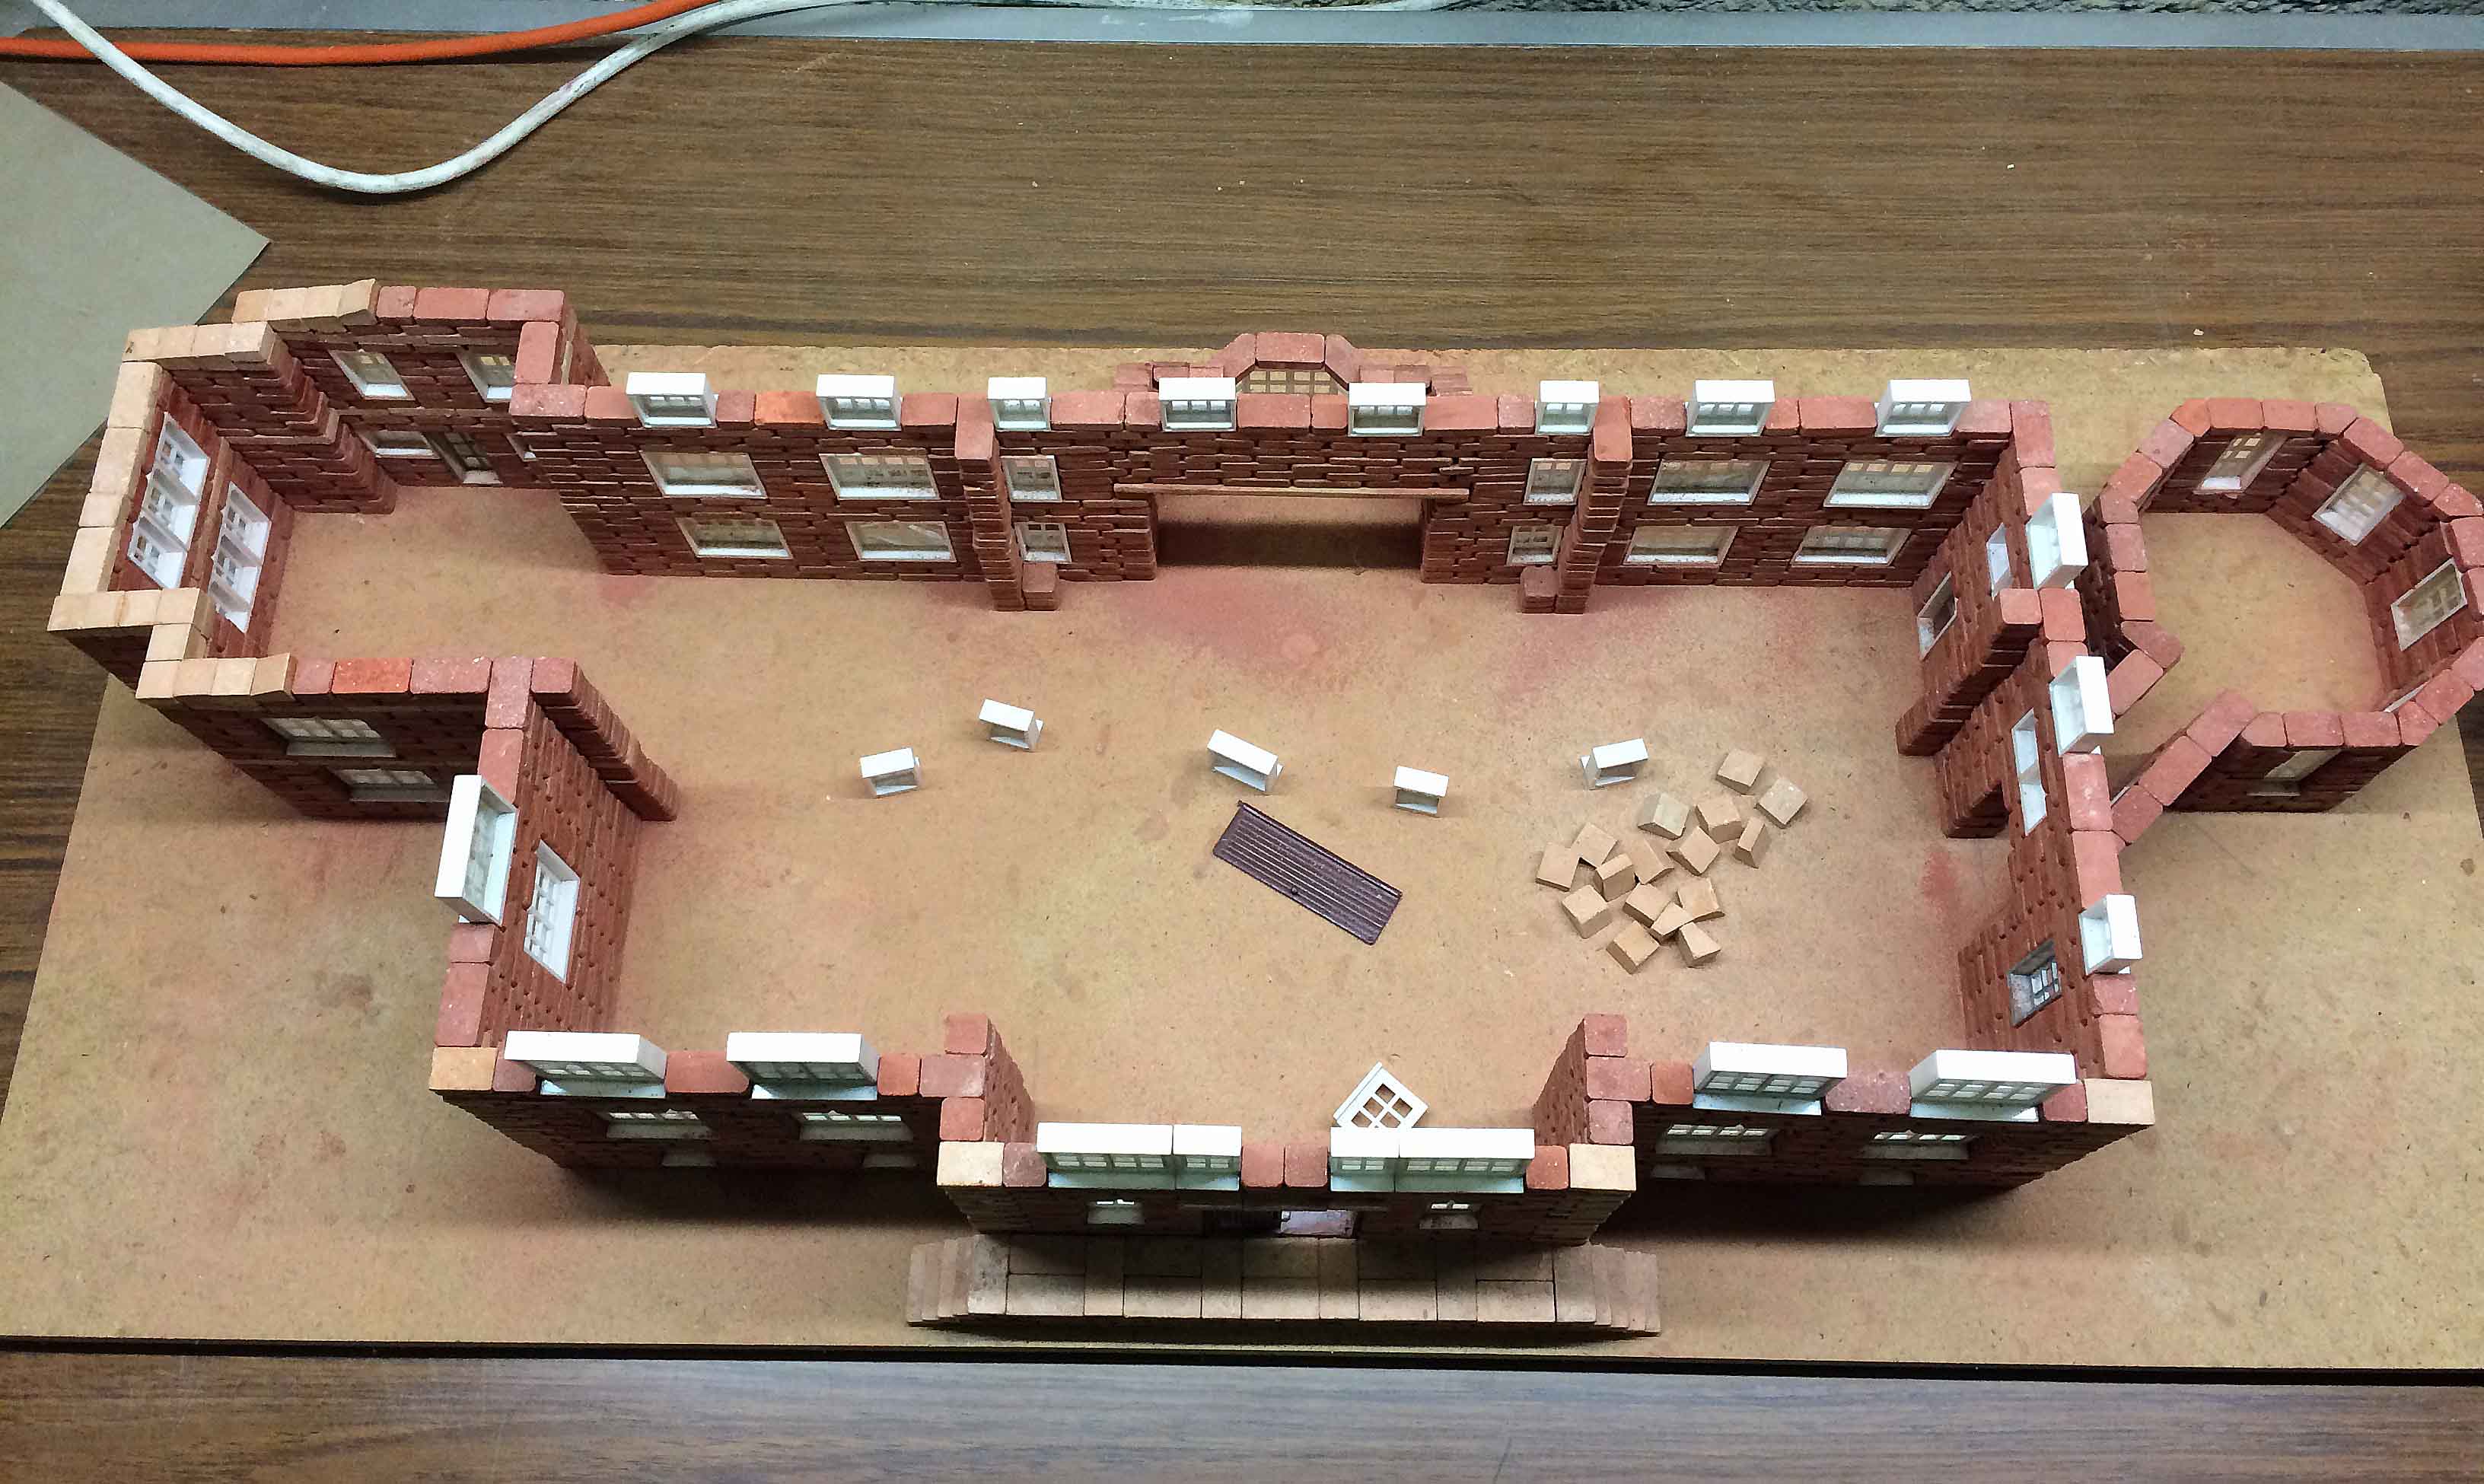
The Sun Room is complete, and to build the wall above it a beam has been installed across the opening. There is also a gap in the wall where the passageway goes out from the West Wing to the Octagon. A beam was not necessary here. Bricks were built out over the gap and just supported while the glue dried.
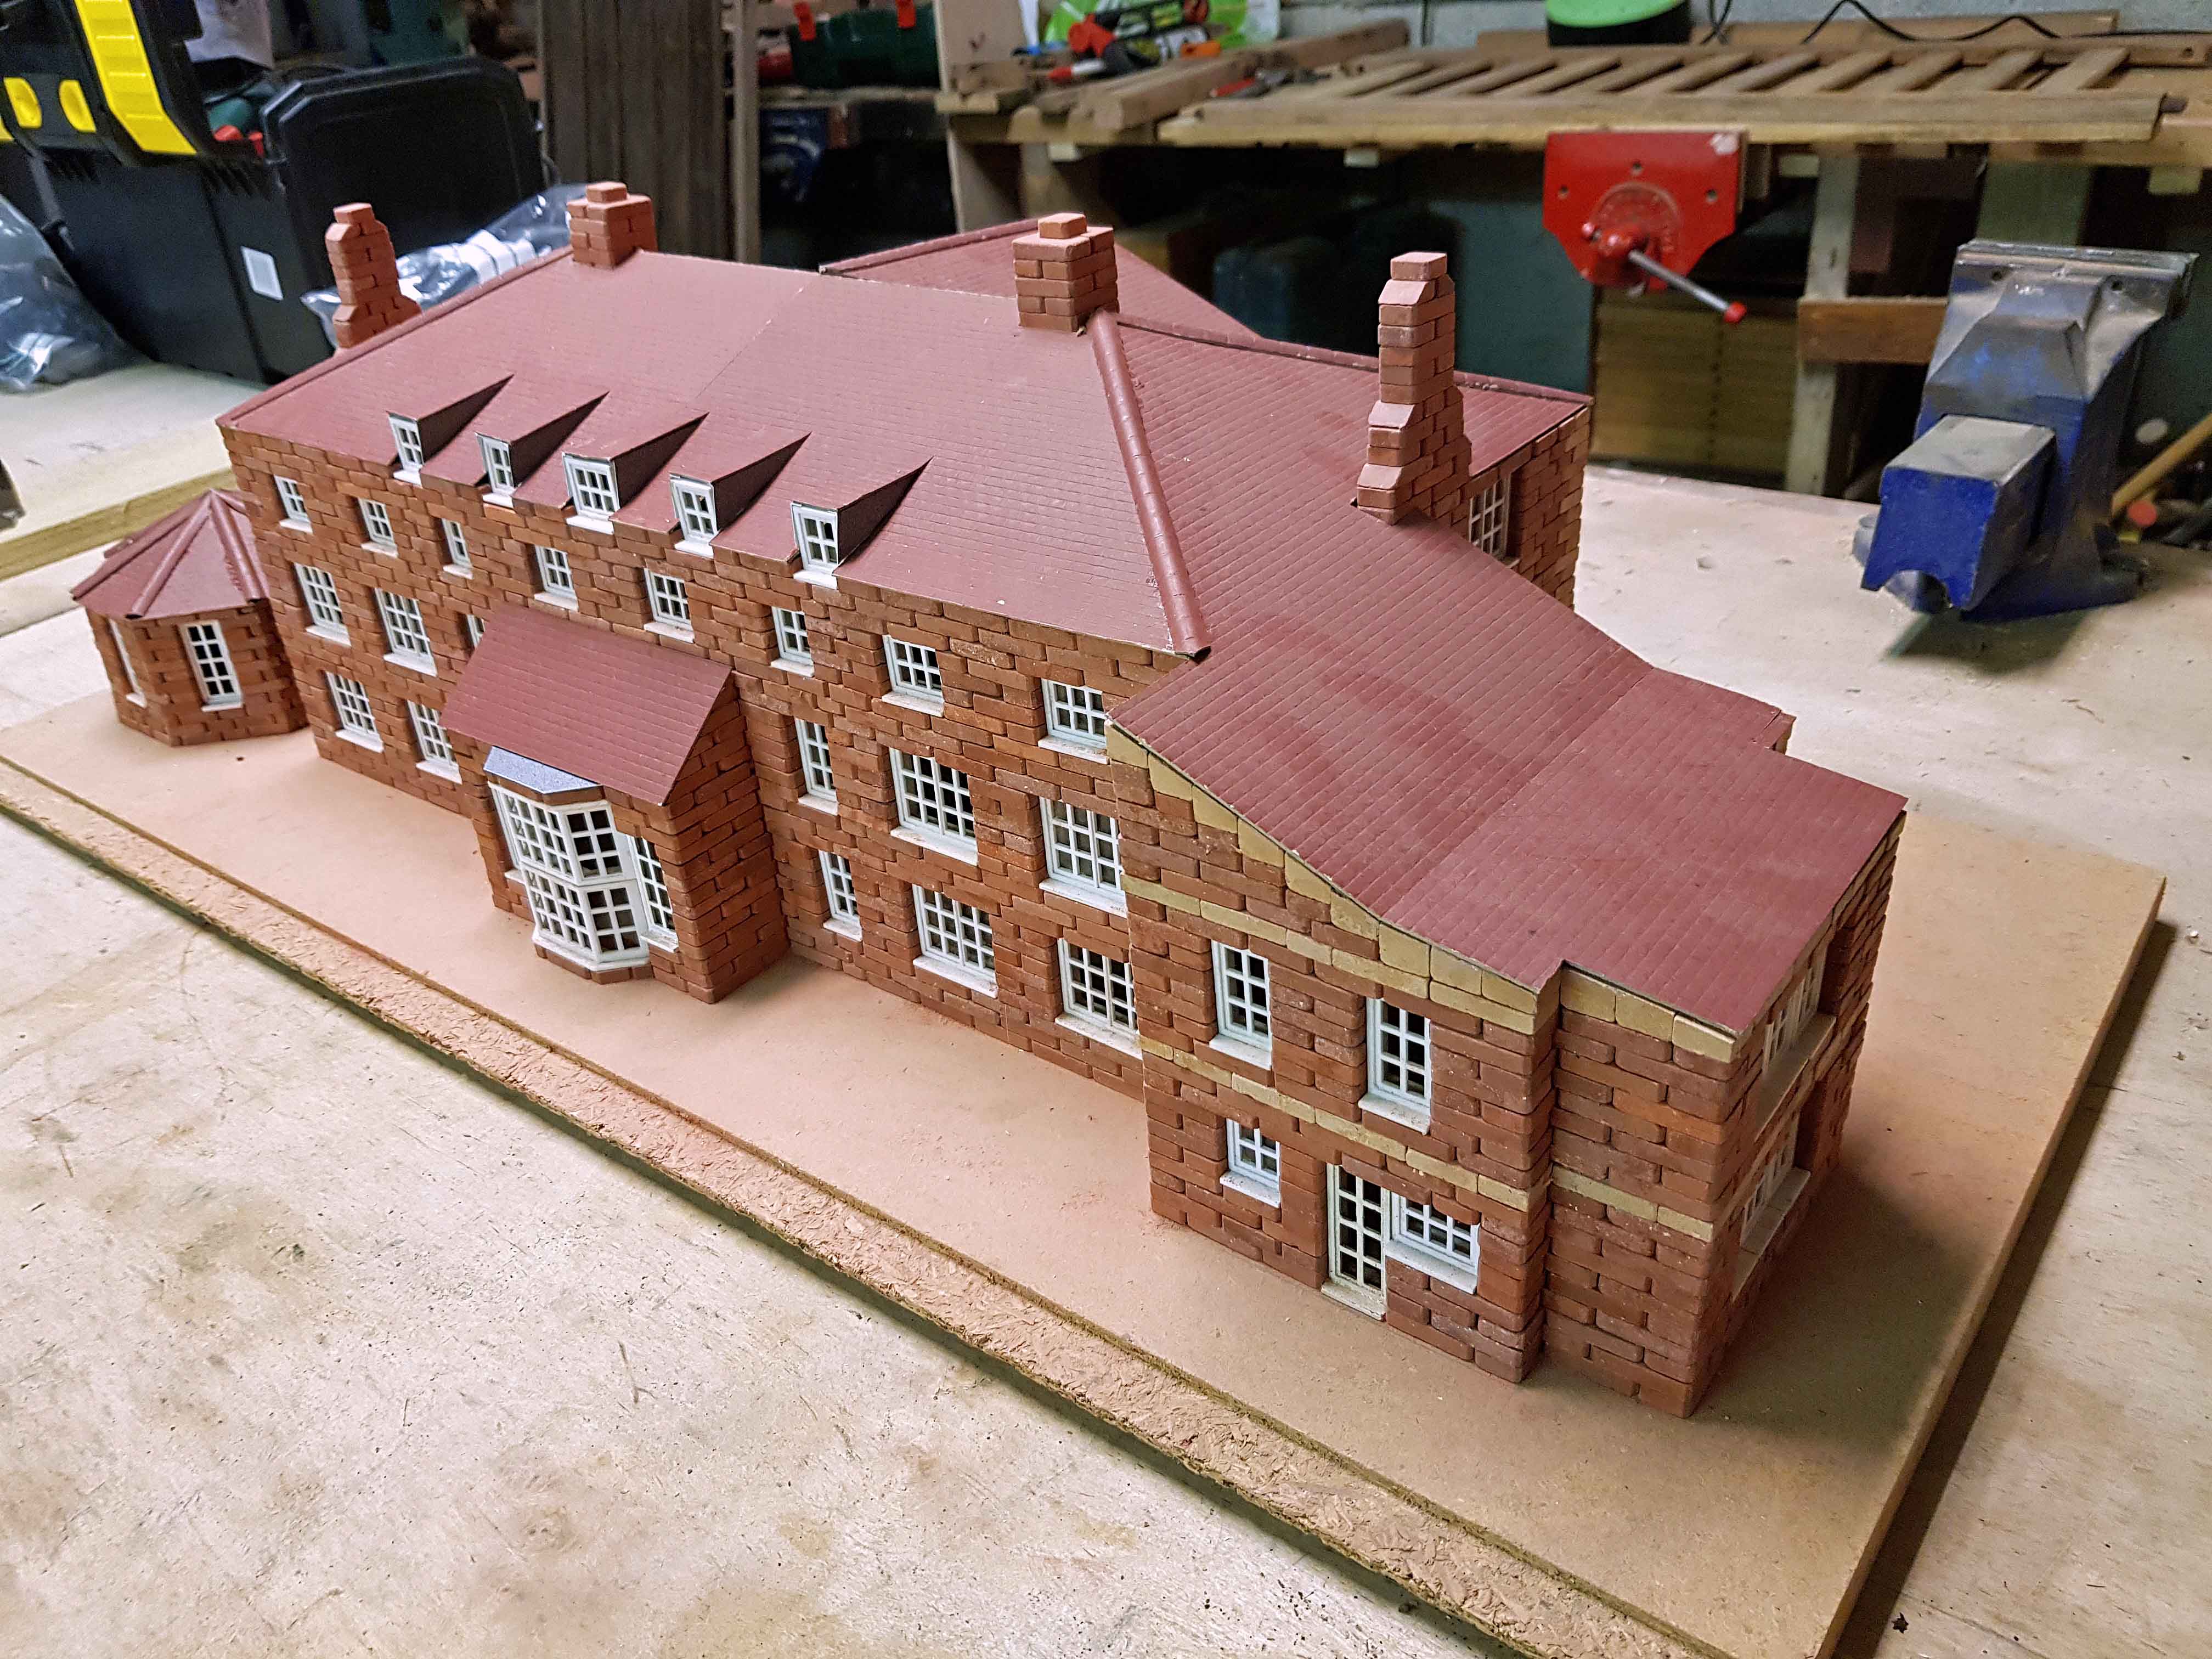
Finally, the next photo shows the walls complete and ready for the roof and the chimneys.
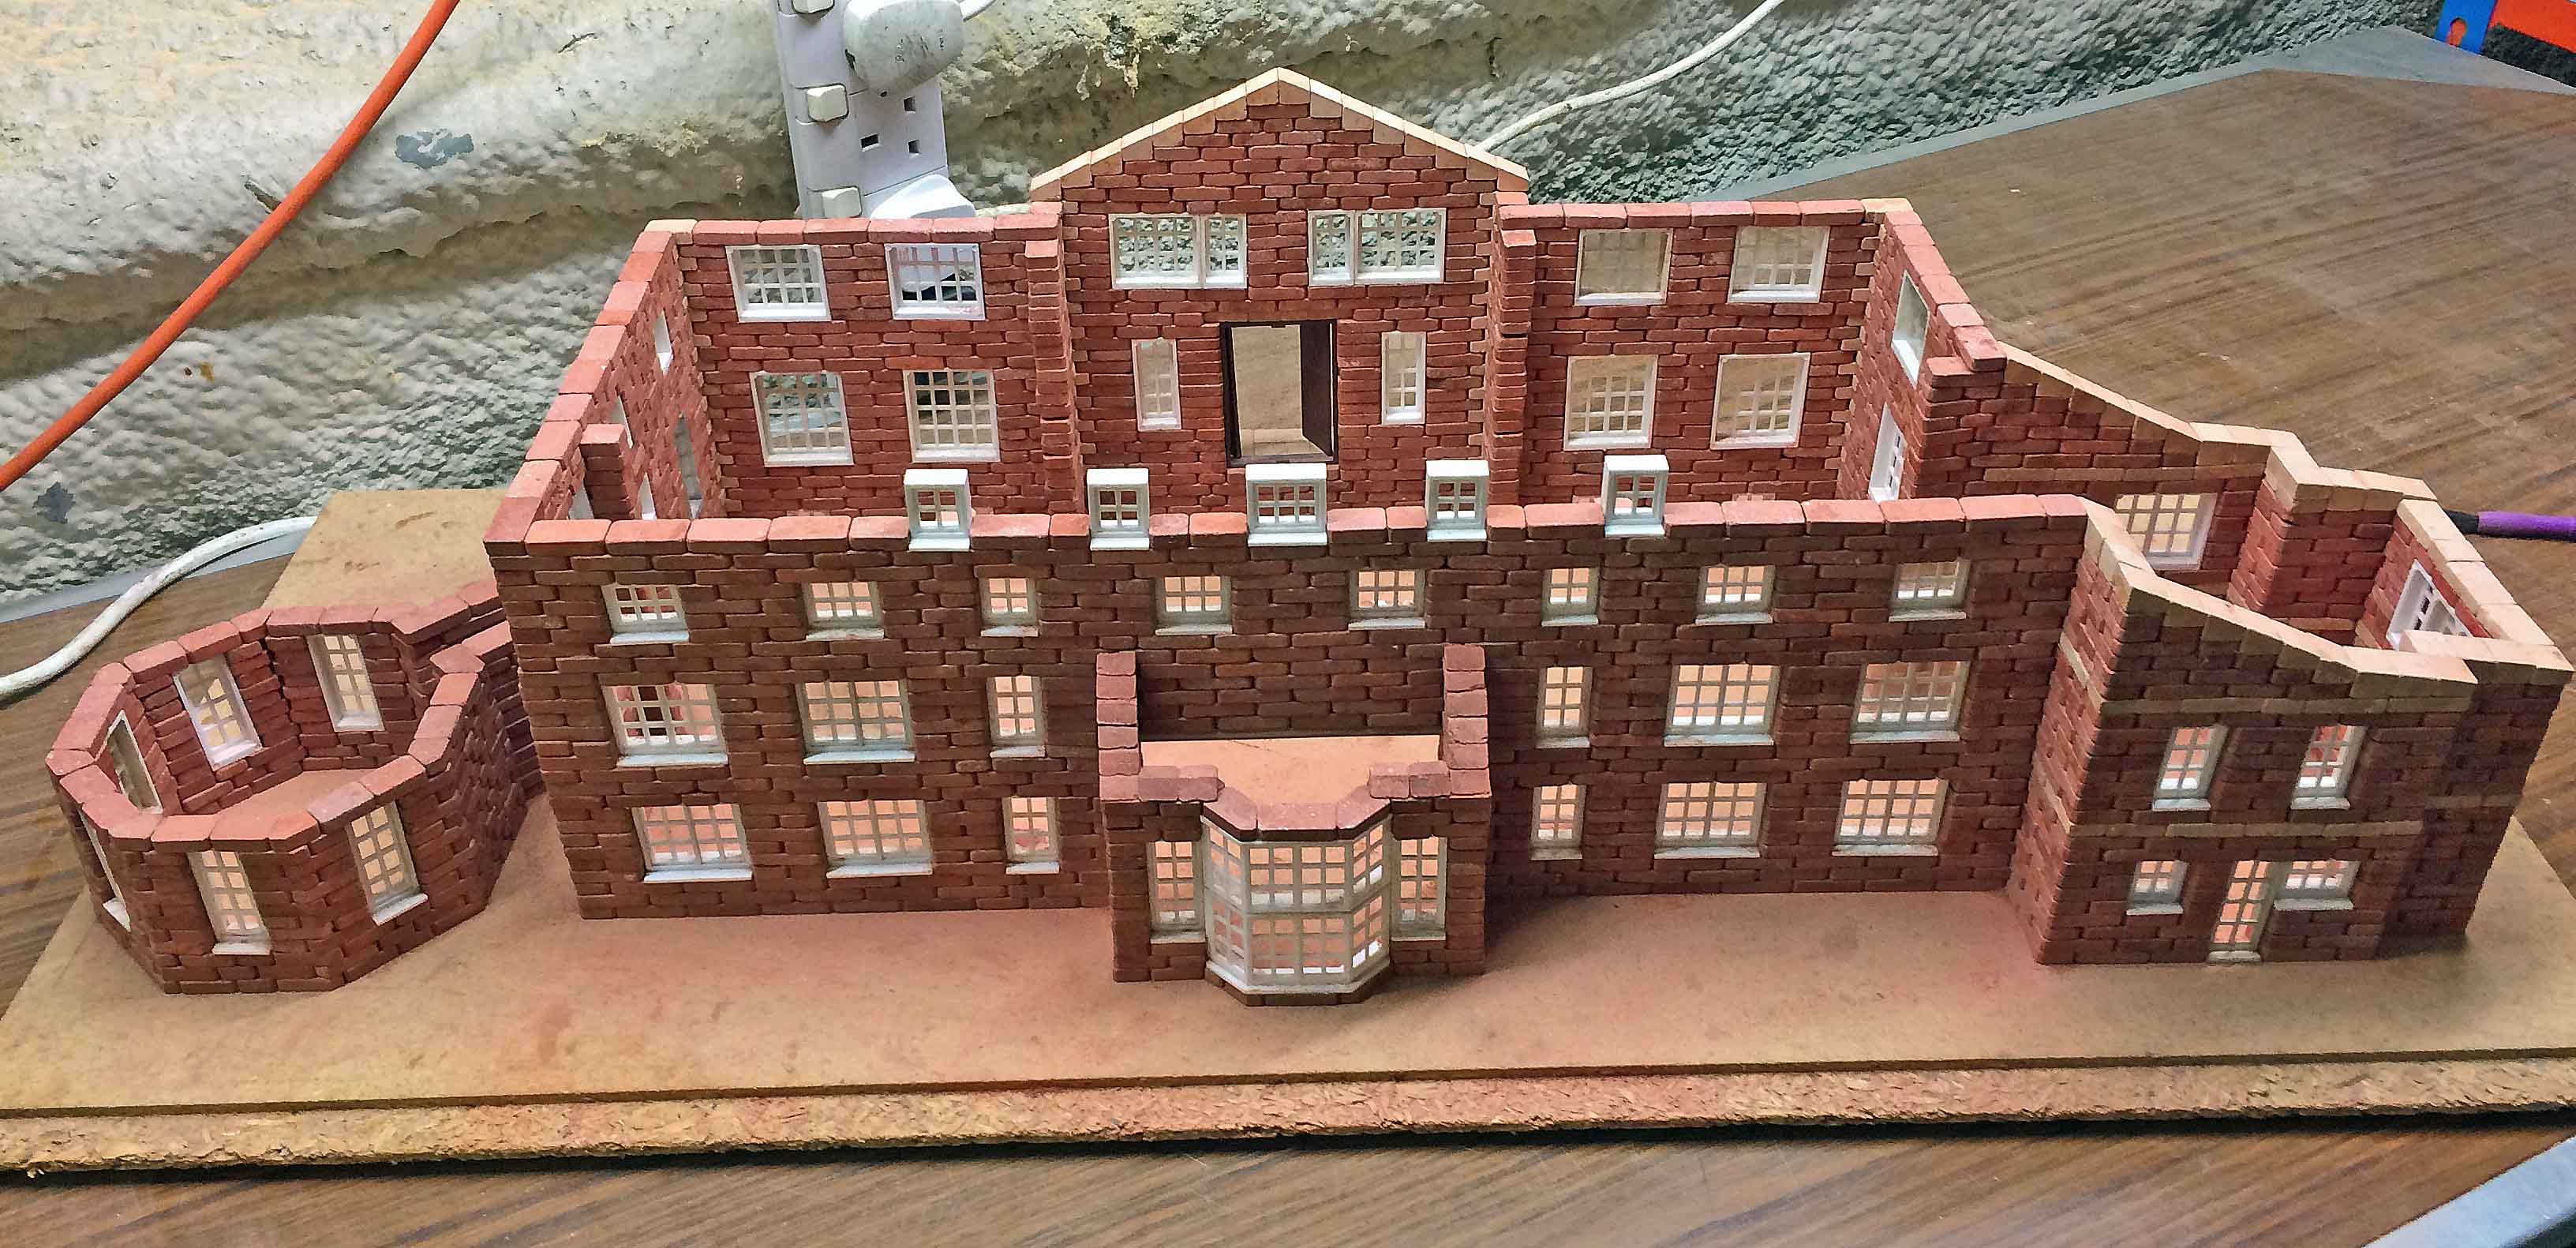
To build the two chimneys in the middle of the main building, as shown in the elevations, a board was placed across the top of the six projections and the chimneys built on top of that.
For a hipped roof, you need to specify a height, or equivalently the pitch (slope) of the roof. I thought that a Standard Brickplayer pitched roof on a building this size would mean the roof would be rather high. I wanted a lower roof and hence needed a shallower pitch. I chose to use the pitch of Contemporary Brickplayer gable bricks LB4, which rise one course per half inch. (See the components page) That meant using those LB4 bricks for the gable at the front of the house, to match the pitch of the main hipped roof. The Annex also has a sloping roof, but simply continuing the slope of the main hipped roof would have brought the roof too far down, so the gradient changes, using the even shallower pitch of the Contemporary bricks LB5, LB6 and LB7.
The image below shows the plan I made for a view looking down on the roof. In fact, I decided on a simpler design for where the roof goes over the bit of the Annex that projects out at the back of the house.
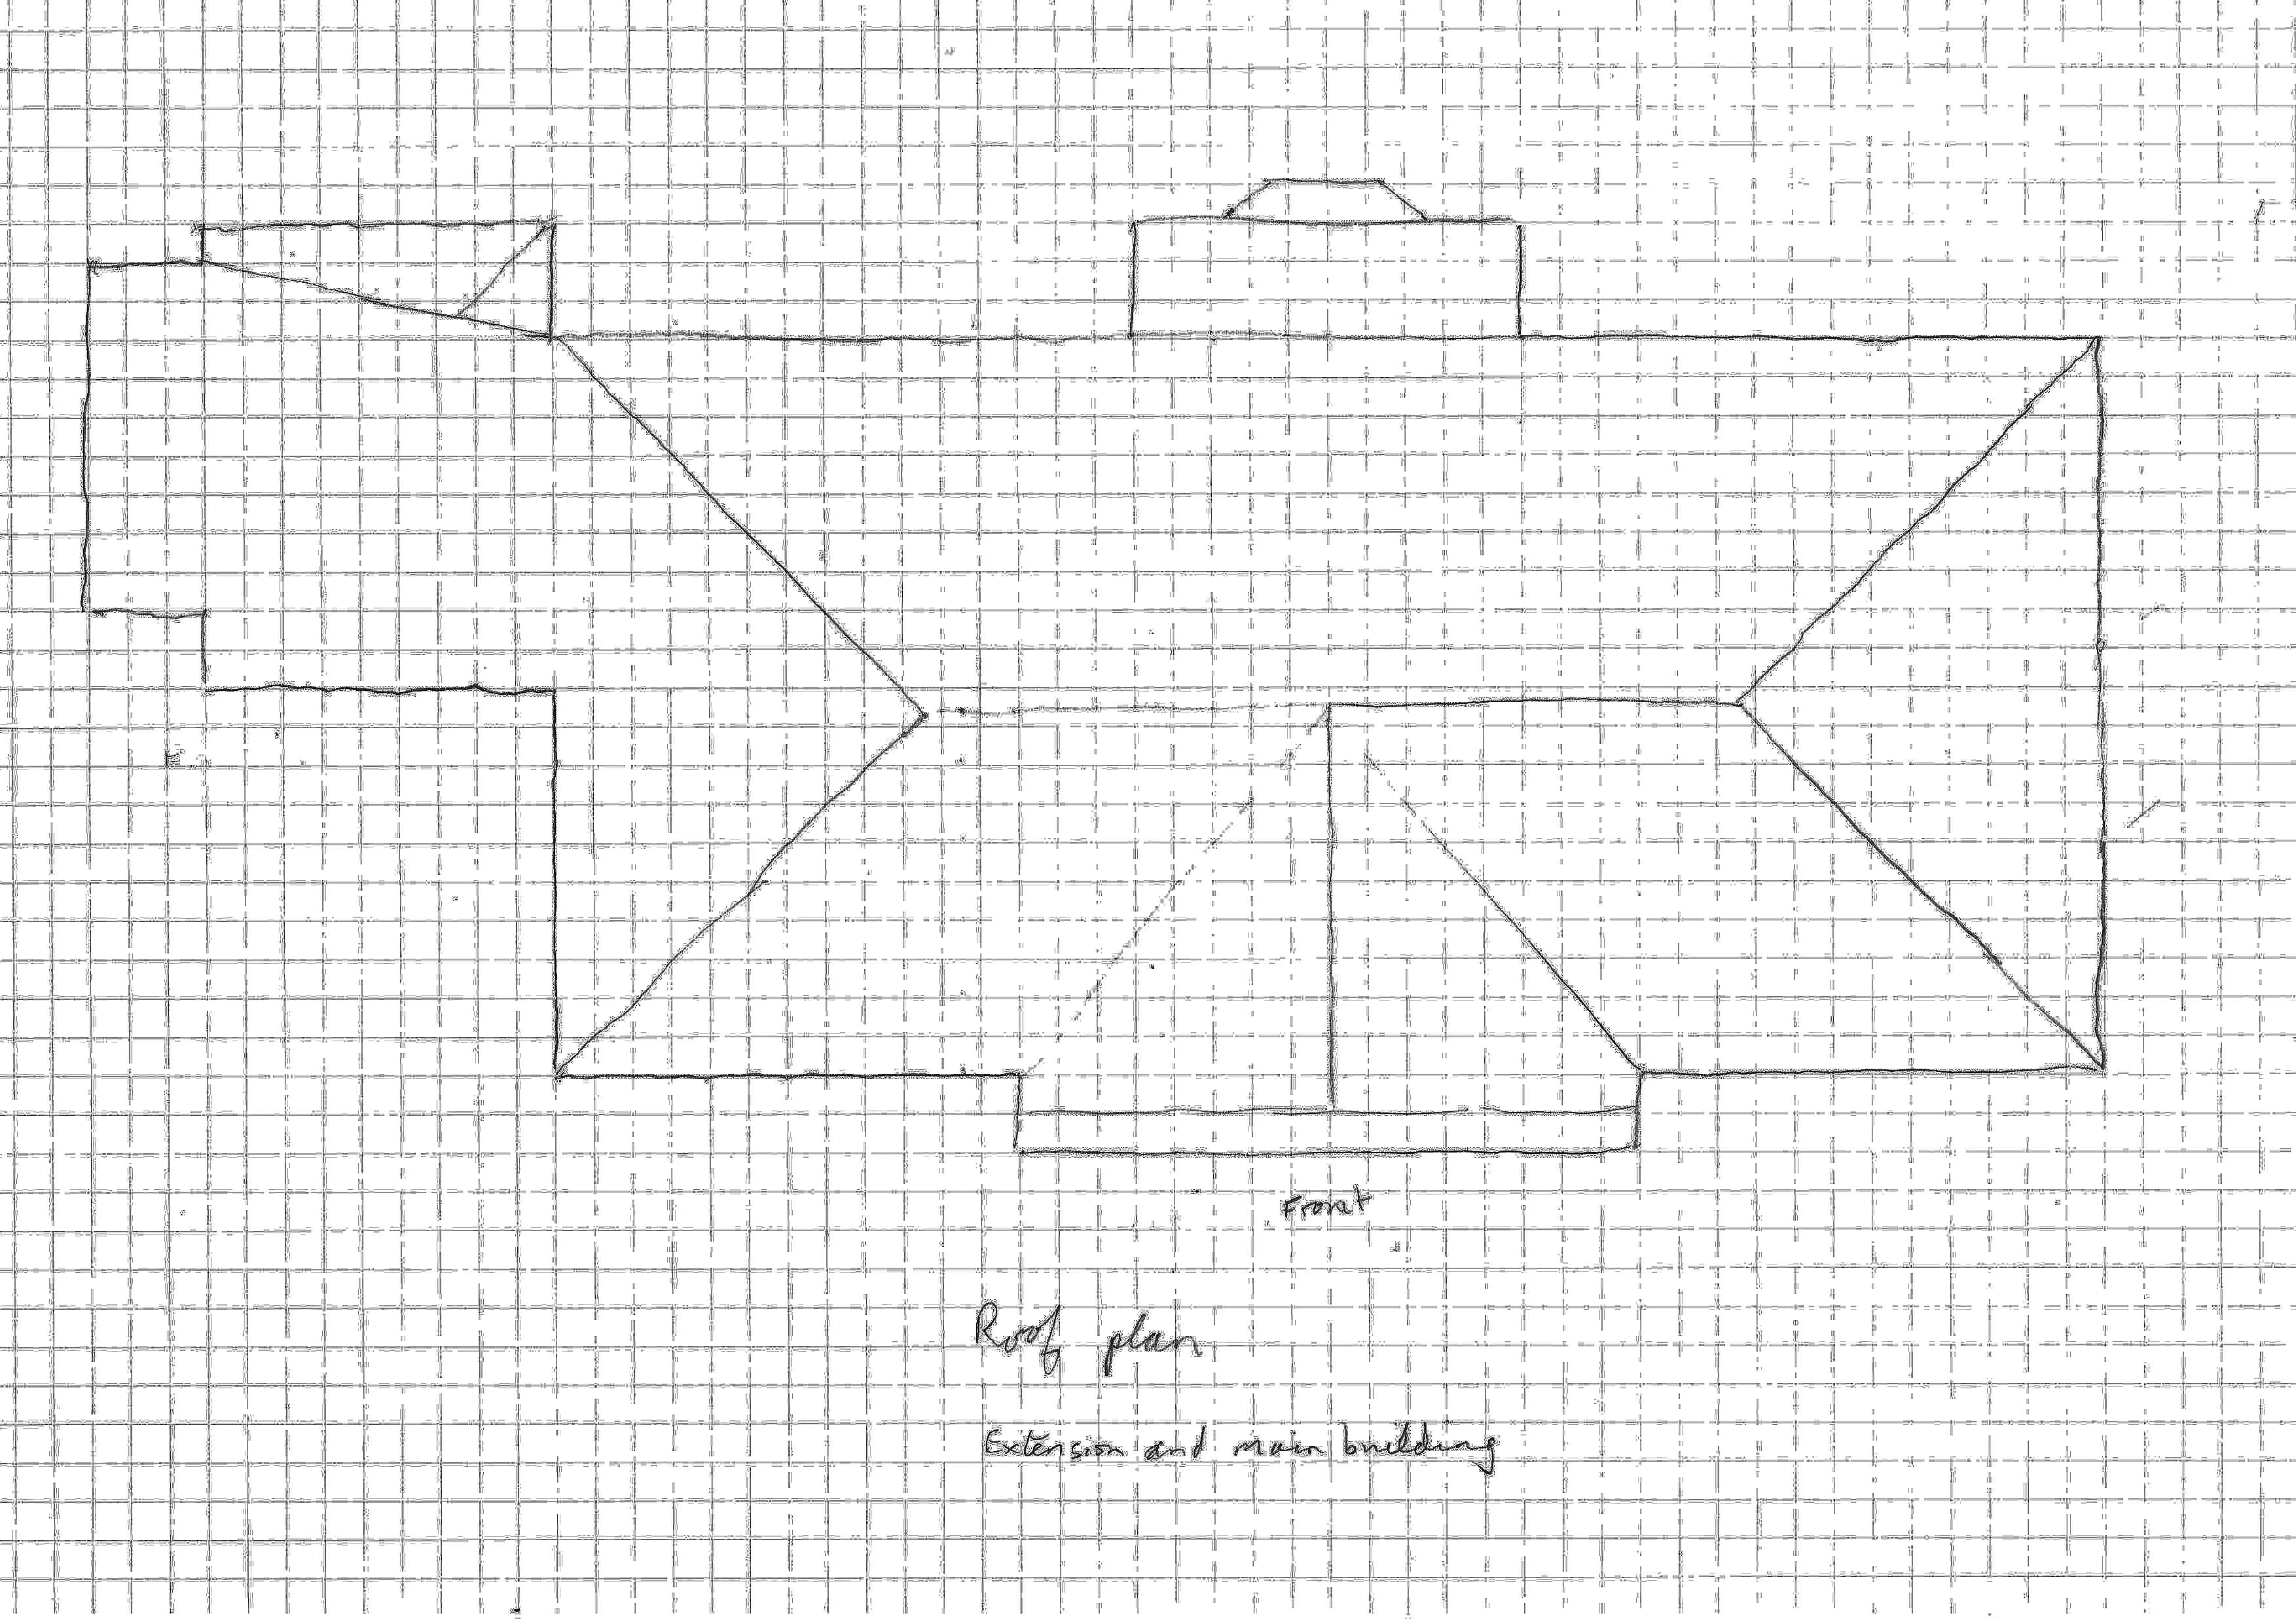
Another lesson learnt from this project was the need to make roof pieces big enough to get a little overhang. In the finished model, there is some overhang by pure chance in some places, but it is not consistent.
The Octagon has a pitched roof with the same pitch as the main roof, but the sloping roof over the Sun Room has the steeper pitch of Standard Brickplayer because I felt to use more of the pale Contemporary Brickplayer gable bricks here would be distracting. There is a flat roof over the Sun Room's bay window and also over the passage between the Octagon and the West Wing of the main building. For this, I bought a sheet of simulated tarmac from a model shop. This was also used for the sides of the dormer windows at the rear.
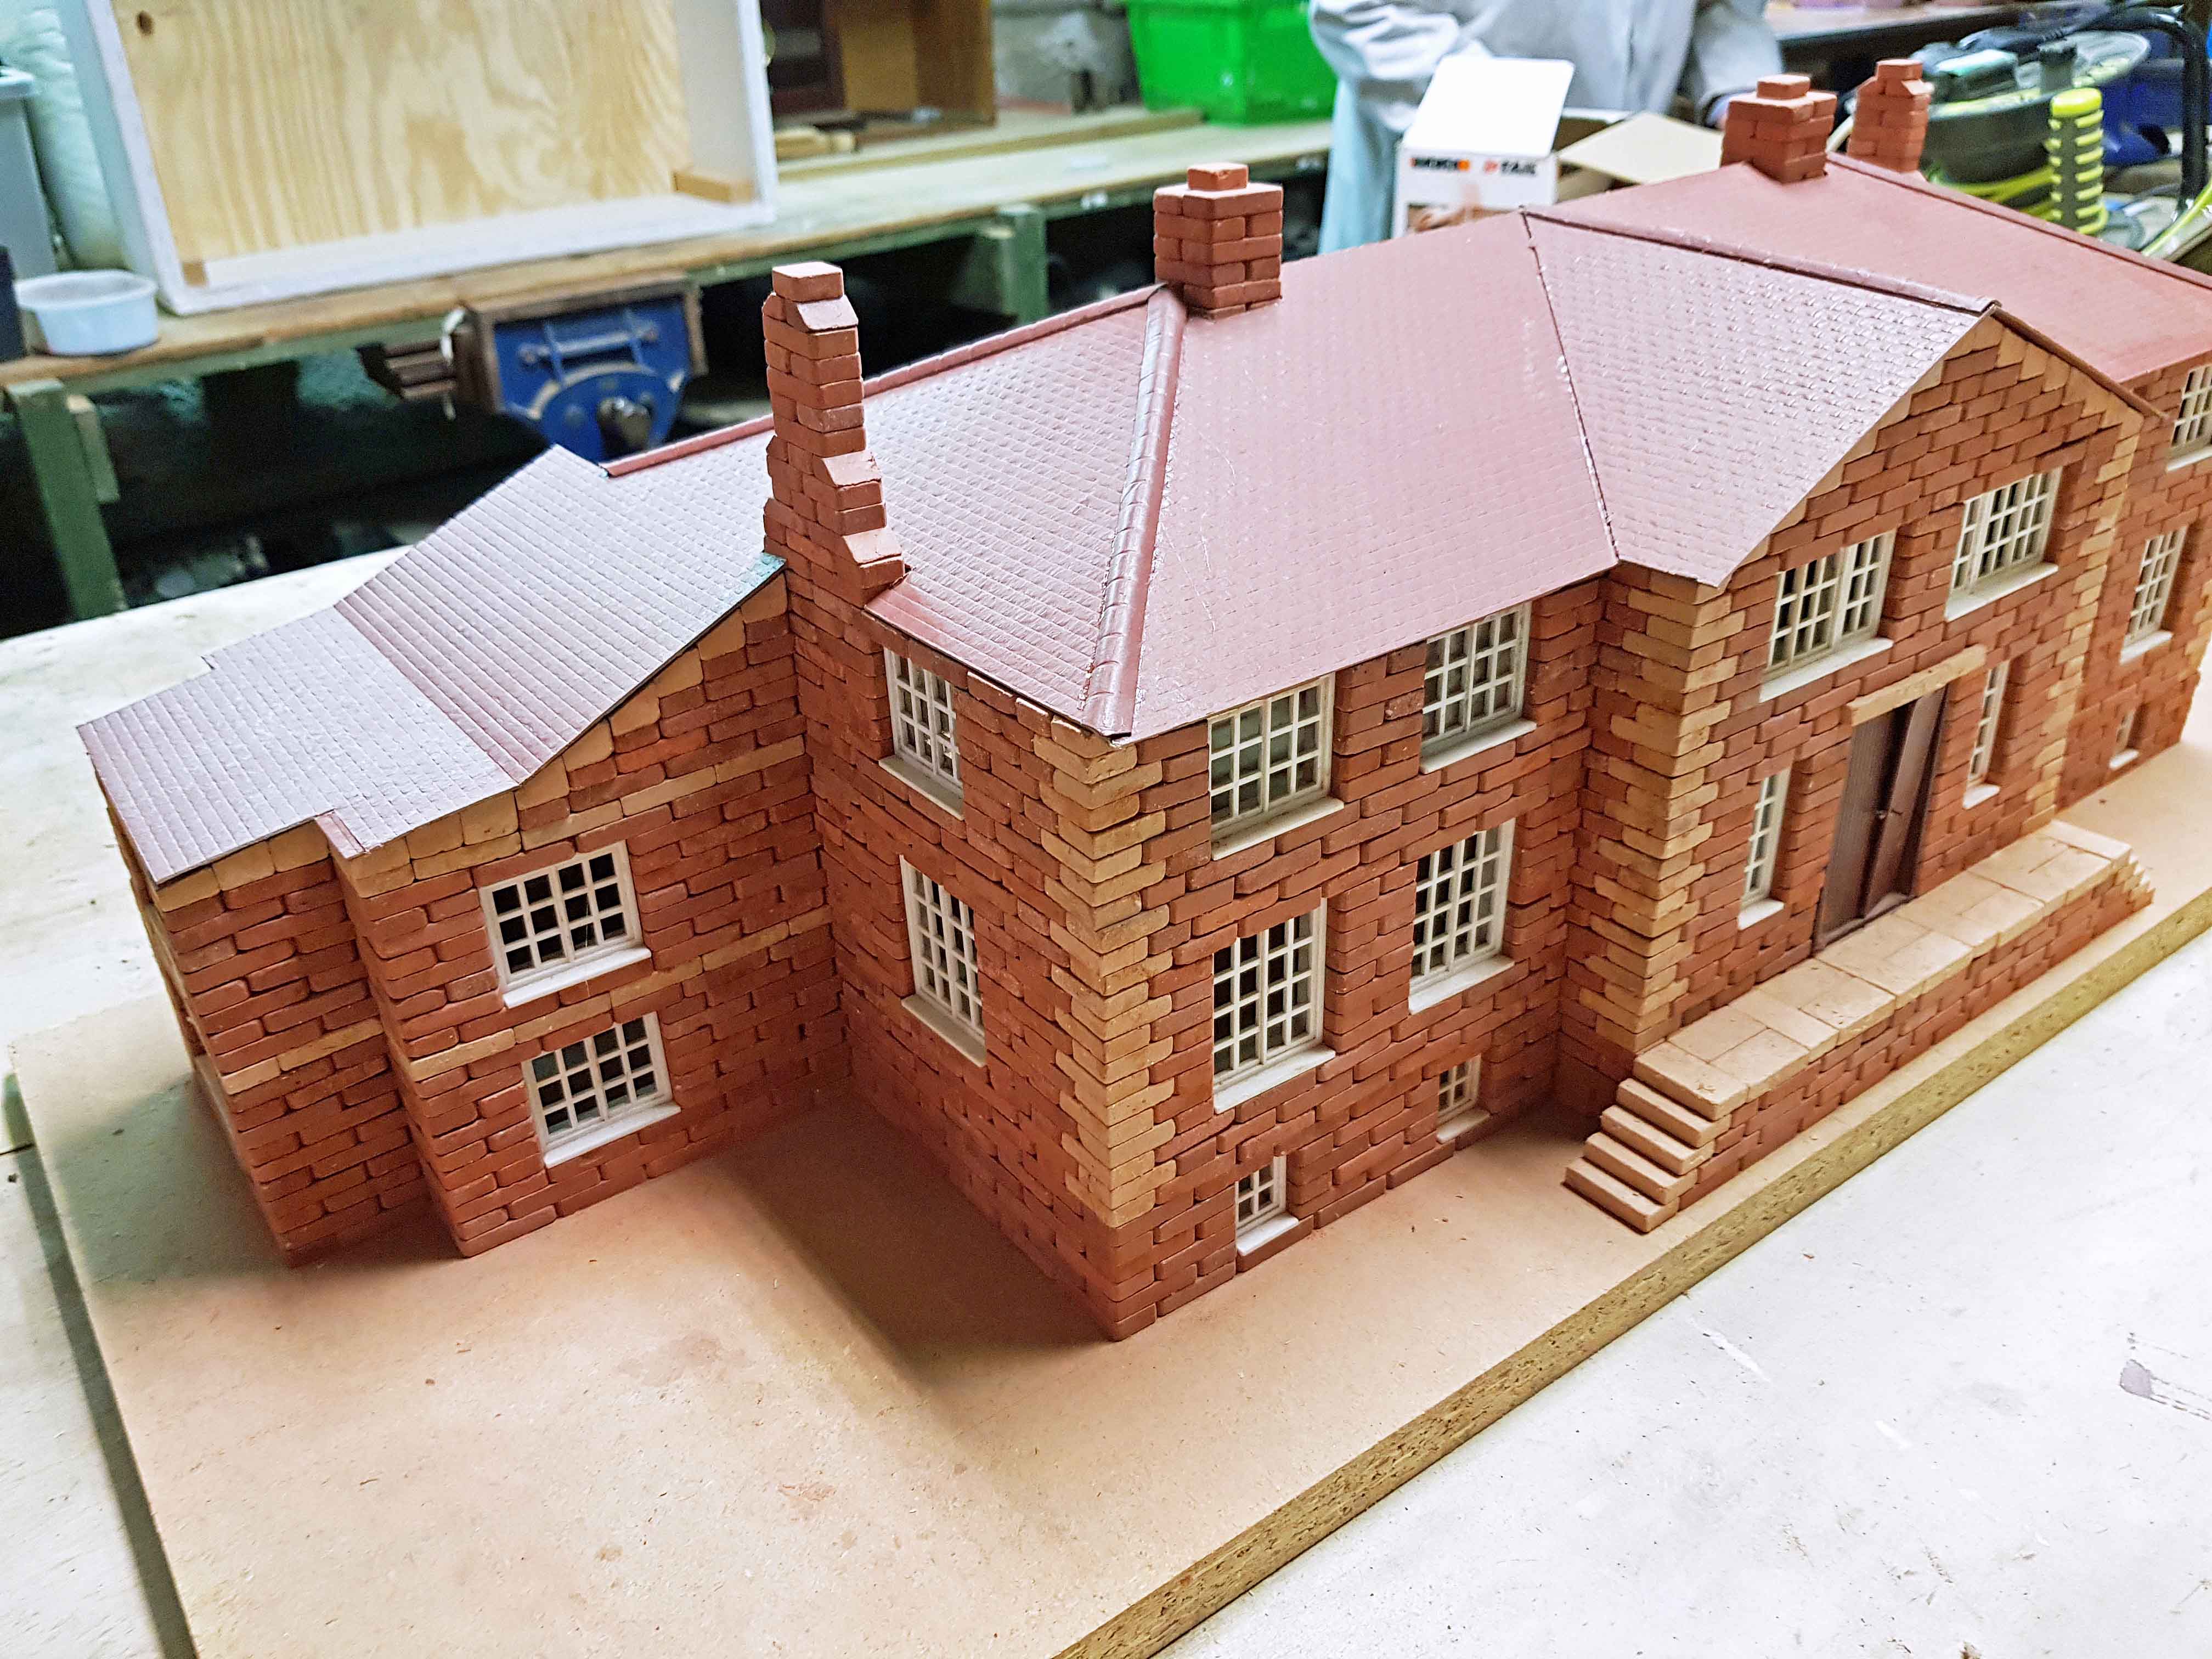
However, I was persuaded by family and friends to "finish the job". So the images at the top of this page show the result. The paving and grass were also acquired from online model shops. Finally, a neighbour in the building trade supplied me with some grit of various colours and sizes, which I used to simulate gravel and rockery stones.
My first Brickplayer project was now complete, and the only remaining challenge was to find somewhere to put this large and very heavy model!
More links: This Brickplayer website sits within my personal website tonyohagan.co.uk. The links below provide access to the other parts of my website.

|

|

|

|

|

|