N.B. You can use the links in the above list to jump to the instructions for each particular type of roof, but I recommend you read the whole page first, even though it is quite long, because the techniques are built up as the page progresses.
Many other styles are shown here, some of them quite complex, but they can all be addressed by building on these simple recipes. Images of the roof styles below are copied from that website, with thanks.
What is normally referred to as a flat roof is horizontal, or with negligible slope. In Brickplayer models, flat roofs like this are usually made from the concrete roofing sheets, which would generally be pre-cut to size for a model in the instruction book and may not be suitable for your model. However, it is easy to obtain sheets representing concrete, tarmac or gravel from modelling supply shops/websites.
It is really simple to measure and cut the roof piece to your required size. Notice, however, that real roofs generally overhang their walls slightly, so consider whether to cut your roof slightly larger to create an overhang. It should be no more than about a quarter of an inch on each side (corresponding to one foot overhang when scaled up).

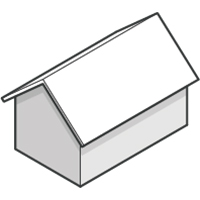
Any roof that is not flat is called a pitched roof. Pitched roofs in Brickplayer will generally be made using tiled roof sheets. A sloping roof, also called a monopitch or shed roof, is the simplest pitched roof. In the image above, there are two such roofs.
A sloping roof is just like a flat roof, and in a case like the front roof in the above image, it is possible just to measure the lengths of wall along the front and down the slope. However, if it butts up against another wall, as would be the case with the back roof in the above image, the measurements may be more difficult to make accurately. Fortunately, there is a simple way that does not even need a ruler or tape measure. It is time to introduce Pythagoras!
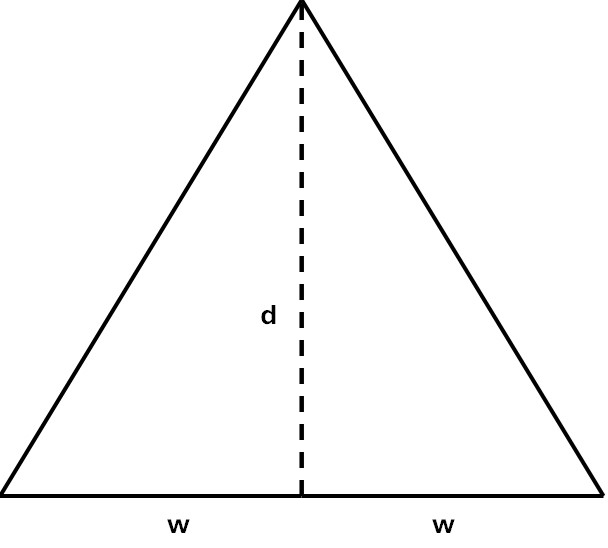
Suppose that the top part of the side wall, shown from the top to the bottom of the sloping roof, looks like the image below, with width w inches and height (from top to bottom of the roof) h inches.
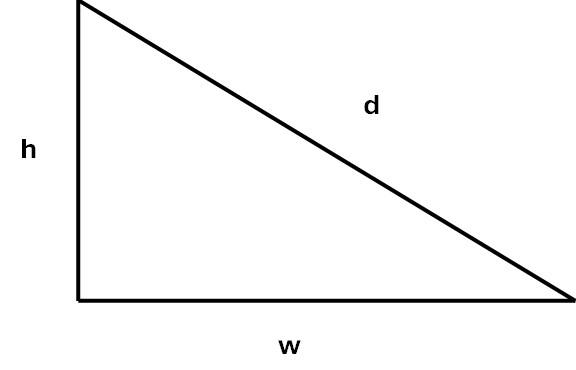
Pythagoras's Theorem says that the square of the length of the sloping side, d, is equal to the sum of the squares of the other two sides. Thus d is the square root of the sum of h squared and w squared.
The width measurement w is a matter of counting inches. Remember that each full brick is one inch, 1", long and the shorter ones are ¾" or ½". So w is simply the number of full brick equivalents. The sloping measurement is more difficult because it will no longer be a neat number of inches and will depend on the gradient, which is known as the pitch of the roof. Between them, Standard and Contemporary Brickplayer kits offer gable bricks of three different pitches - see the components page. On the other hand, bricks have a constant height, 7⁄32", so one way to measure the height that the sloping roof will have is by simply counting the number of courses.
It is a good idea to check your figures. If you have counted c courses and you are using the Standard Brickplayer gable bricks (B4, B5), then you should find that c equals 4w; with Contemporary bricks LB4 the pitch is shallower and c should equal 2w, whereas with Contemporary bricks LB5, LB6 and LB7 the pitch reduces even further so that c becomes 2w/3.
If the roof slopes down by c courses then h is c times 7⁄32. So h squared is c squared times the square of 7⁄32, which is 0.048. Therefore w squared plus 0.048 times c squared is the square of the sloping roof length d. This gives us the following simple recipe.
Sloping roof calculation
To calculate the length d in inches for a sloping roof with a vertical fall of c courses over a width of w inches:
A gable is just two sloping roofs that meet at a ridge. Each roof piece can be calculated separately as above. To join the two pieces, three methods can be used.
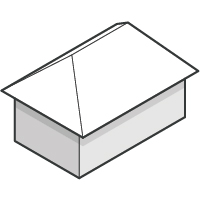
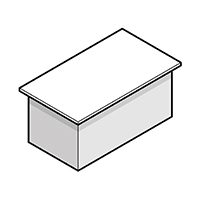
The traditional hipped roof has four sloping sides, but now the pieces are no longer simple rectangles.
Before proceeding further, we need to consider whether to use a soffit board. Standard Brickplayer models with hipped roofs built the roof on top of a soffit board, which makes for a more solid roof and also creates a more realistic overhang. For a simple hipped roof as shown above, the board can be relatively thin because it does not need to carry weight. (A stronger board would be needed if your model will involve building on top of it - see the examples in my projects page.) The board should be slightly wider all round than the walls, no more than about ¼", to create the overhang.
The roof is made up of four pieces. There are two triangular pieces, one at each end, and two pieces whose shape is technically a trapezium, one on each side. These two shapes are shown below.
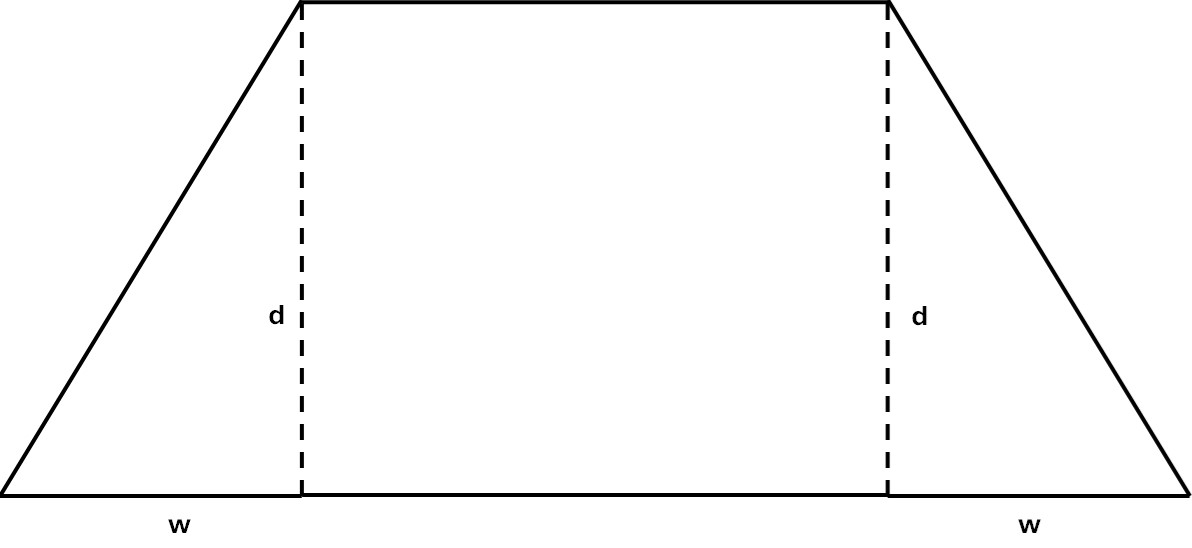
Solid outlines define the shapes to be cut out, while the dotted lines simply indicate the height.
The length d is the sloping length in inches of each piece from the wall to the ridge. The pieces all have the same value for d, because I assume that all four roof pieces should have the same pitch. (This is usually the case in practice, but it does not have to be that way. The ends could slope more or less, thereby shortening or lengthening the ridge. It is even possible for all four pieces to have different pitches, although that would look odd, to say the least!)
The length w is half the length in inches of the shorter or end wall. If using a soffit board, it is half the length of the board's shorter side, otherwise take the number of inches (or whole brick equivalents) in the end wall and add a little for overhang. To calculate d we have another choice to make: how high should the ridge be above the walls? Let this height be h. The larger the value of h, the higher and steeper the roof will be. A sensible and simple choice is to match the pitches of the available Brickplayer gable bricks. As discussed in the case of a sloping roof, to get a pitch equivalent to using the Standard Brickplayer gable bricks B4 and B5, h will be the height of 4w courses, whereas with Contemporary Brickplayer gable bricks LB4 it will be 2w courses and with Contemporary bricks LB5, LB6 and LB7 it will be 2w/3 courses. Then for a height of c courses, the calculation of d is exactly as in the Sloping roof calculation.
Finally, if the length in inches of the longer or side wall is b, then the ridge length at the top of the trapezium shapes is simply the difference between the two wall lengths, b - 2w. If using a soffit board, b should be the length of the board's longer side, otherwise take the number of inches (or whole brick equivalents) in the side wall and add a little for overhang.
To build the roof, pieces should be joined using one of the methods described for a gable roof, and then finished with a length of ridge tiling along each joint. If using a soffit board, the pieces need to be fixed to the board. In Standard Brickplayer models with soffit boards, tabs were added to the bottom of each roof piece, which are then folded under and glued to the board. The finished roof can simply sit over the walls, or if using a soffit board the board can be glued in place.
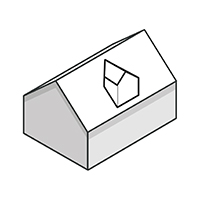
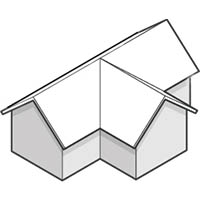
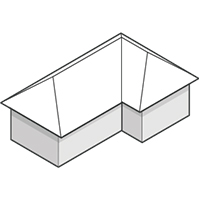
The first image shows a gable-roofed dormer built into a gable roof. The second is a gable T-projection on a gable roof and the third is a hipped L-projection on a hipped roof.
A dormer is simply a projection into the roof line. A dormer roof can be flat, sloping, gabled or hipped. (And there are other styles; this link not only shows some alternatives but is an entertaining and informative commentary on dormers generally.) Constructing a flat or sloping roof on a dormer is straightforward following the above guidance, but to give it a gable or hipped roof we need new shapes for the side pieces. These same shapes can be seen in all three of the images above, so they can be calculated in the same way.
For a gable projection, we need the following shape.
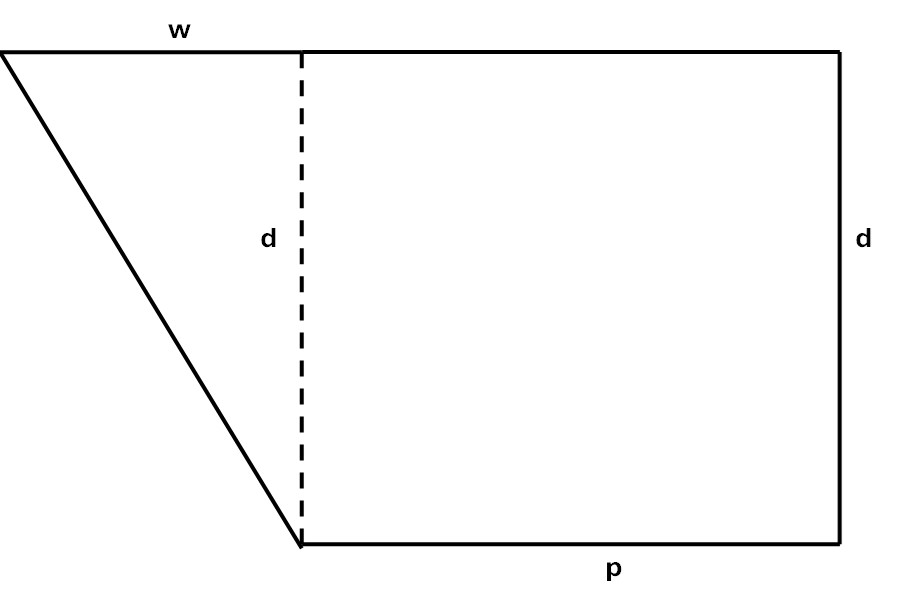
The sloping length d is computed as for the gable roof, using the height h and the half-width w of the gable projection (as in the Sloping roof calculation). The length p is simply the distance by which the projection projects from the original roof. The top length of the roof piece is p plus a distance that is shown as w, i.e. the same as the half-width of the projection, on the assumption that the pitch of the projection roof is the same as the original roof. (Otherwise, it is the w value corresponding to the height h of the projection roof and the pitch of the original roof. Note that in the middle image above the original and projection gables have the same width and the same pitch, which is why the two ridges meet. More usually, the projection gable will be narrower, so that its ridge meets the original roof below the original ridge.)
If the projection is to have a hipped roof, it should be easy to adjust the above appropriately based on the development so far.
Finally, having built the projection roof there are options for attaching it to the original roof. One option is simply not to attach it, but just to let it rest against the other roof. If you wish to attach it, you can add tabs to the edges where the projection roof meets the other, fold them under and glue. But for a more authentic roof, you can cut away the original roof, or in fact make it with the triangular piece omitted from the start. Then the new projection roof can be fitted in and fixed in place either by adding tabs and folding them out behind the original roof, or else using tape behind.
And here is one final tip: test your design by cutting your roof pieces out of plain cardboard and putting them together, before you go ahead and cut those precious Brickplayer tiling sheets!
More links: This Brickplayer website sits within my personal website tonyohagan.co.uk. The links below provide access to the other parts of my website.

|

|

|

|

|

|